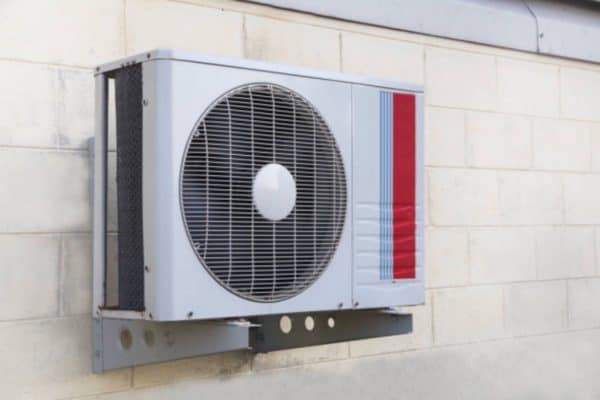
How to Install a Mini Split (10 Steps)
The installation of a mini split involved a series of mounting, positioning, fitting, wiring and testing. How difficult it is will depend on the individual. If you’re thinking of installing a mini split, here is what it takes to install a mini split from start to end.
To install a mini split, you need to choose a suitable installation location first. Then, you need to connect the piping and wiring. Before you can test run the mini split, you need to pressure test and vacuum the system, and release the pre-charged refrigerant.
Many people are considering DIY installing a mini split. However, they’re not sure about the complexity involved. So, I outlined all the steps required to install a mini split in detail.
Mini Split Installation Tools
There are a few tools that are essential for the installation of a mini split. Some of these tools are only used in mini split installation and they are not sharable with other applications.
- Manifold Gauge Set
For leak test and vacuum (and, refrigerant charge if necessary). It usually comes with a red hose, a blue hose and a yellow hose. Get the one rated for R410A and R32, not R22. - Vacuum Pump
To vacuum the mini split system. It is essential to remove the moisture inside the piping system in order for the mini split to perform well. It may come with a port adapter to connect the mini split. Otherwise, a separate port adapter is required. You can also buy a vacuum pump set that includes a manifold gauge, hoses and adapters (more convenient). - Flaring Toolkit
For flaring the refrigerant pipes for a no-leak connection. It can be bought as a toolkit which normally comes with a pipe cutter. - Allen Key
To open the service ports and release the pre-charge refrigerant at the end of the installation. - Torque Wrench (Adjustable)
For flare connections. To avoid over-tightening the flare nuts, a torque wrench is recommended. Follow the manufacturer’s tightening torque for the best flare nut connections. One more adjustable basic wrench is also needed to tighten two loose nuts. - Screwdrivers
Basic tools for mounting the mini split, opening the covers and connecting the wires. - Cordless Drill
For drilling holes in the wall to mount the indoor unit. Also needed for drilling a hole in the wall to penetrate the pipes and wires from the indoor unit to the outdoor unit. - Hole Saw
To drill a 2.5″ or 3″ hole in the wall for the pipes and wires to go from the indoor unit to the outdoor unit. Other means of penetrating the pipes and wires (eg: through the window) are possible. - Digital Scale (Optional)
To measure the weight (amount) of the refrigerant being charged into the mini split when the installed refrigerant pipe length exceeds the pre-charged refrigerant length which is normally around 25 ft. Check with the seller. - Refrigerant Cylinder (Optional)
To top-up additional refrigerant when needed. - Refrigerant Leak Detector (Optional)
To check any refrigerant leaks from the pipe connections. Putting soap water on the pipe connections to check for any bubbles is the primary (basic) method to check for any leaks. - Leveler (Optional)
To ensure the mini split is level. Other means of making sure the mini split is level can replace this tool. - Spring Bender (Optional)
To assist in bending the copper tube and prevent kinks. - Clamp Multimeter (Optional)
Extra precautions to check the voltage and ampere.
The above tools are essential for mini split installation. Together, they may cost around $350-400 depending on where you bought them and how many you bought. Next is the installation steps.
By the way, if you want to learn more about mini split especially how to design it for your house, consider my Mini Split (eBook). You’ll learn what is Mini Split, how to choose and more importantly, spark more design ideas to improve the energy efficient of your house. But, if you need a second opinion or want someone to help you design, then you can consider my consultation service.
Consultation Service
Ask me for HVAC advice such as brand selection, best model, benefits, features, placement, duct size, grille size, how to design, design check, verification and other HVAC related queries.
10 Steps to Install a Mini Split
The installation of a mini split can be grouped into 10 steps. Some of the steps are straightforward but many of the steps require more explanation which I included the additional resources as well.
Step 1 – Choose an Installation Location
After you bought the mini split, the first step is to determine where to install the indoor and outdoor units. In short, there are three things you need to pay extra attention to.
First is the indoor and outdoor unit clearance requirements. How much space is needed for the indoor and outdoor unit for adequate ventilation (airflow) to ensure the mini split performs as intended and the warranty is not voided.
Second is the maximum piping length between the indoor and outdoor units. How far can the outdoor unit be from the indoor unit respective to the amount of pre-charged refrigerant as well as the performance limitation of the mini split.
Third is the maximum height difference between the indoor and outdoor units. How far can the outdoor unit be from the indoor unit in terms of the vertical height limited by the mini split compressor oil return capability.
Apart from the above requirements, you may also want to look at subjective needs such as the aesthetic of the indoor unit, how to cover up the piping and wiring as well as other objective needs such as avoiding snow from piling up the outdoor unit.
So, I encourage you to read my article on Mini Split Placement Guide | Pros & Cons (with Photos) where I included all of the aspects that I can think of when choosing an installation location.
Once the installation location is decided, proceed to install the indoor unit.
Step 2 – Mount the Indoor Unit
After deciding the installation location of the mini split, the next step is to mount the indoor unit first. The indoor unit of a mini split comes with a mounting plate. The mounting plate must be secured onto the wall and the indoor unit will be clipped onto the plate.
First, locate the stud and position the wall bracket (make sure it is level) and then, mark the drill locations. The necessary screws are included in the indoor unit package. Refer to the screw size to drill the holes accordingly. The screw size can be #8 x 1” (M4 x 25mm), depending on the mini split.
Each mini split has its own recommended screw location by the manufacturer. So, refer to the installation manual to see the manufacturer’s recommended way to attach the mounting plate.
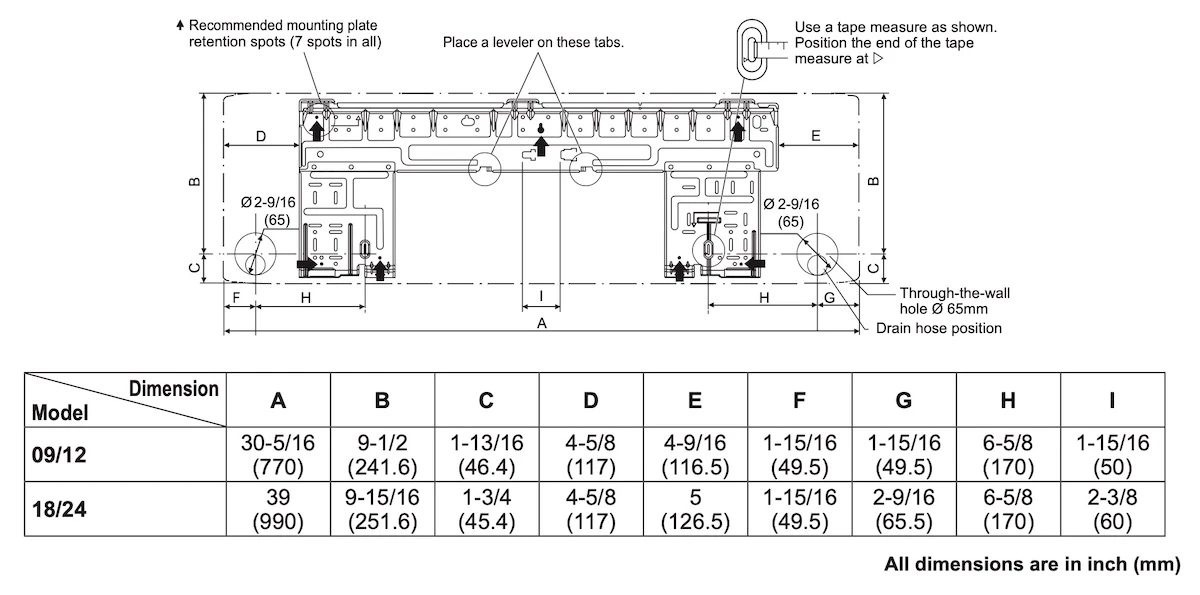
Once the mounting plate is installed, follow the instruction to drill a hole in the wall for the refrigerant pipes, drain pipe, power wires and communication wires to go penetrate through the wall. The hole size is usually 2.5″ or 3″ and it should be slightly tilted, sloping towards the outdoor (for proper drain). A pipe sleeve can be used for protection.
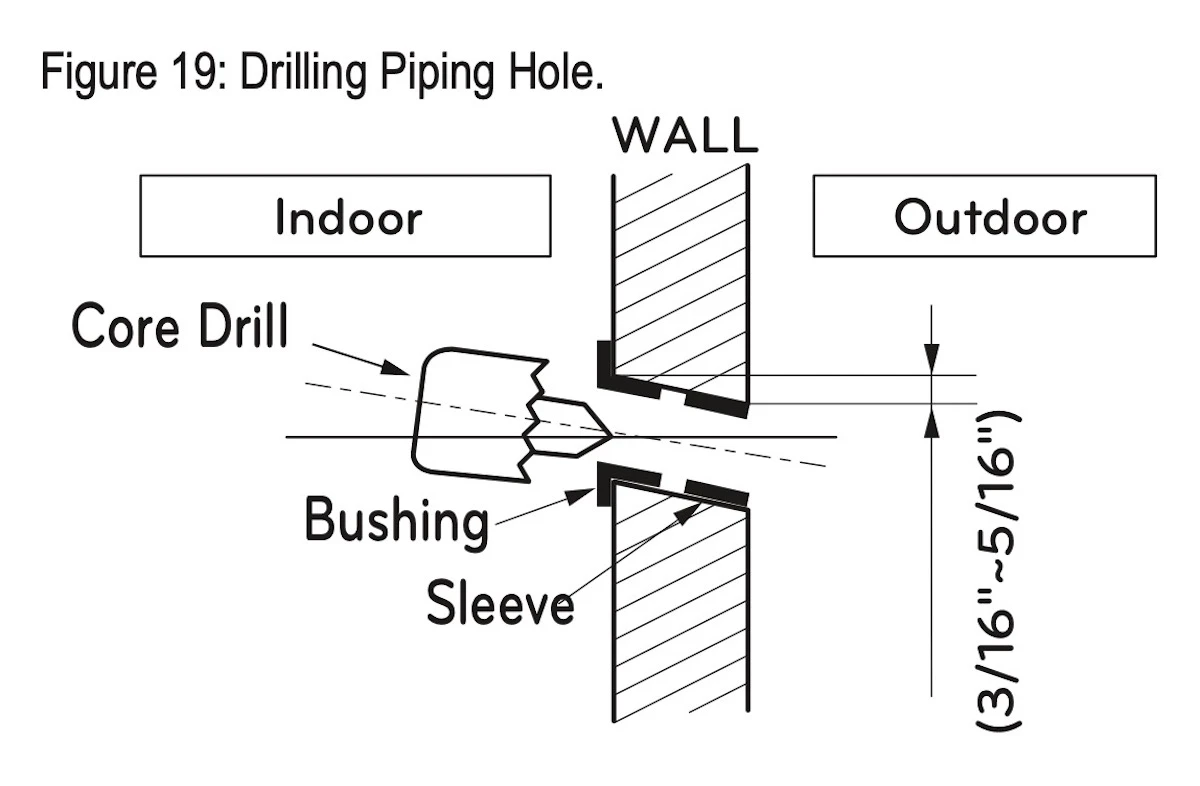
The hole can be on either the left or right side of the mini split indoor unit depending on how you want to penetrate the pipes and wires. Follow the instructions to punch open the access path prepared on the indoor unit cover.
If you don’t wish to drill a hole in the wall or it is not possible for you to do so, you may run the pipes and wires from the indoor unit to the outdoor unit elsewhere (eg: through the window or attic). Nonetheless, the drain pipe must have a gradient to allow the condensate water to flow via gravity. Otherwise, you may need to consider a drain pump. See my article on Do Mini Splits Need a Condensate Pump?
Alternatively, you can also embed the pipes and wires inside the wall. For a complete guide, see my article on Can You Run Mini Split Refrigerant Lines in Walls.
The refrigerant pipes and the drain pipe are normally jointed at the indoor unit but the power and communication wires aren’t. So, before you clip the indoor unit onto the mounting bracket, make sure to connect the wires to the indoor unit first.
Once the refrigerant pipes, drain pipe and wires are ready, use tape or other means to bundle them together so that they don’t spread out. Then, direct the bundle through the hole and clip the indoor unit onto the mounting bracket.
After the indoor unit is installed, proceed to install the outdoor unit.
Step 3 – Place the Outdoor Unit
At this stage, the installation location for the outdoor unit should be decided. As mentioned in my article Mini Split Placement Guide | Pros & Cons (with Photos), the outdoor unit should be placed on a solid foundation. In cold climates, it should be elevated.
Usually, the solid foundation for the outdoor unit is a concrete plinth. However, you can also sit the outdoor unit on a stand bracket, mount it on a wall bracket or by other means as long as it serves the purpose.
Again, it is important to provide sufficient clearance to the outdoor unit. Refer to the installation manual of your respective mini split to see the manufacturer’s recommended spacing.
Once the outdoor unit is secured, proceed to install the refrigerant pipes.
Step 4 – Connect the Refrigerant Pipes
The installation of the refrigerant pipes of a mini split is a major procedure. More time and effort should be allocated for this step.
At this stage, the refrigerant pipes connected to the indoor unit should protrude out of the wall. Gently bend the refrigerant pipes toward the direction of the outdoor unit. If you have a refrigerant pipe cover, it is a good idea to install it now.
In most cases, you need to extend the refrigerant pipes in order to reach the outdoor unit. Thus, an installation kit is required.
Usually, the installation kit of a mini split includes 15 ft or 25 ft refrigerant pipes with one end flared. So, you just to need attach the flare to the union and tighten the flare nut according to the manufacturer’s recommended tightening torque.
Refrigerant Pipe Extension
To connect the flare, remove the cap on the refrigerant pipes. You should hear the sound of air rushing out the pipes and it is normal because the pipes are mildly pressurized with nitrogen gas to prevent moisture from entering.
When attaching the flare, put a small amount of refrigerant oil (or any compatible sealant oil) on the inner surface of the flare for a leak-free connection.
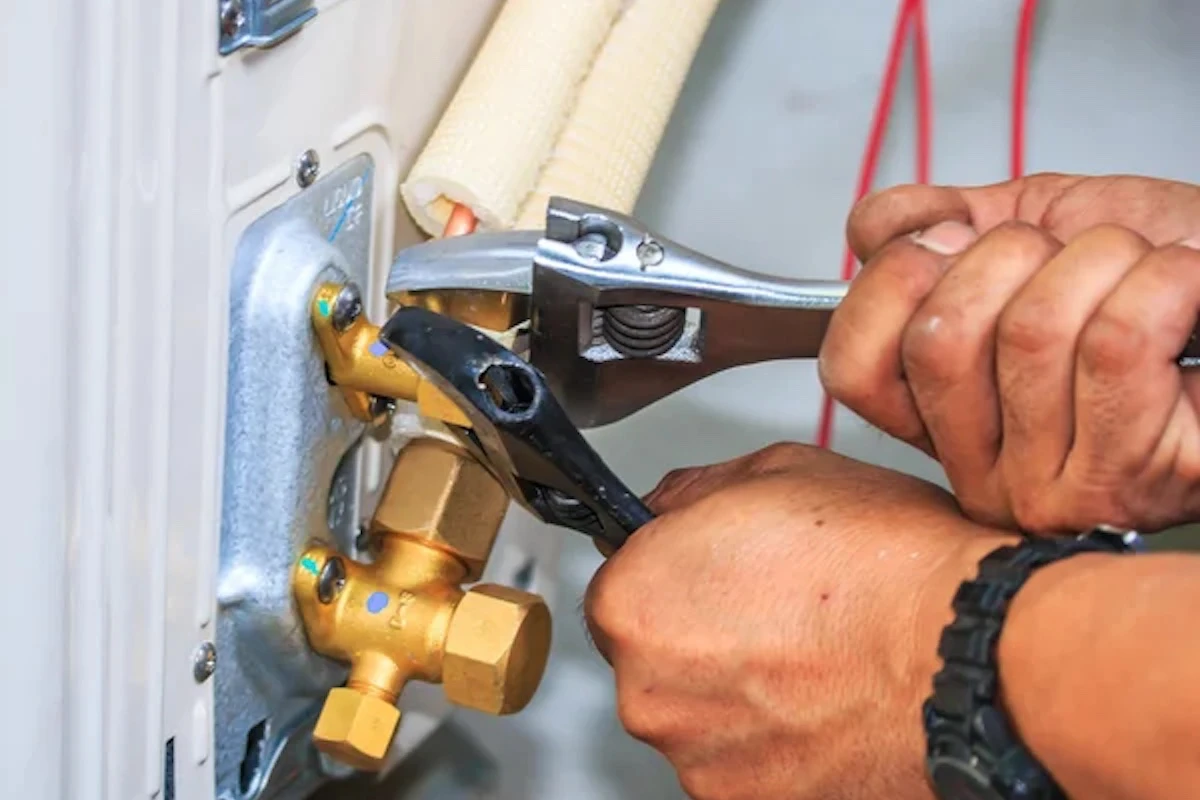
To tighten the flare nut, use two wrenches. One of the wrenches should be a torque wrench where you will tighten the flare nut according to the manufacturer’s recommended tightening torque. Over-tightening the flare nut can cause a leak.
Flare Connection
After the refrigerant pipes have been extended, you can either cut the refrigerant lines to a suitable length or coil them up and leave them as it is. As long as the total length of the refrigerant pipes (one way) does not exceed the maximum pipe length, the mini split will work fine.
Once satisfied with the refrigerant pipe length, remove the flare nut on the liquid and gas line at the outdoor unit and insert the respective flare nut into the refrigerant pipes.
Next, bring out the flare toolkit and follow the instruction to flare the refrigerant pipes. Check the quality of the flare before you connect the refrigerant pipes to the outdoor unit.
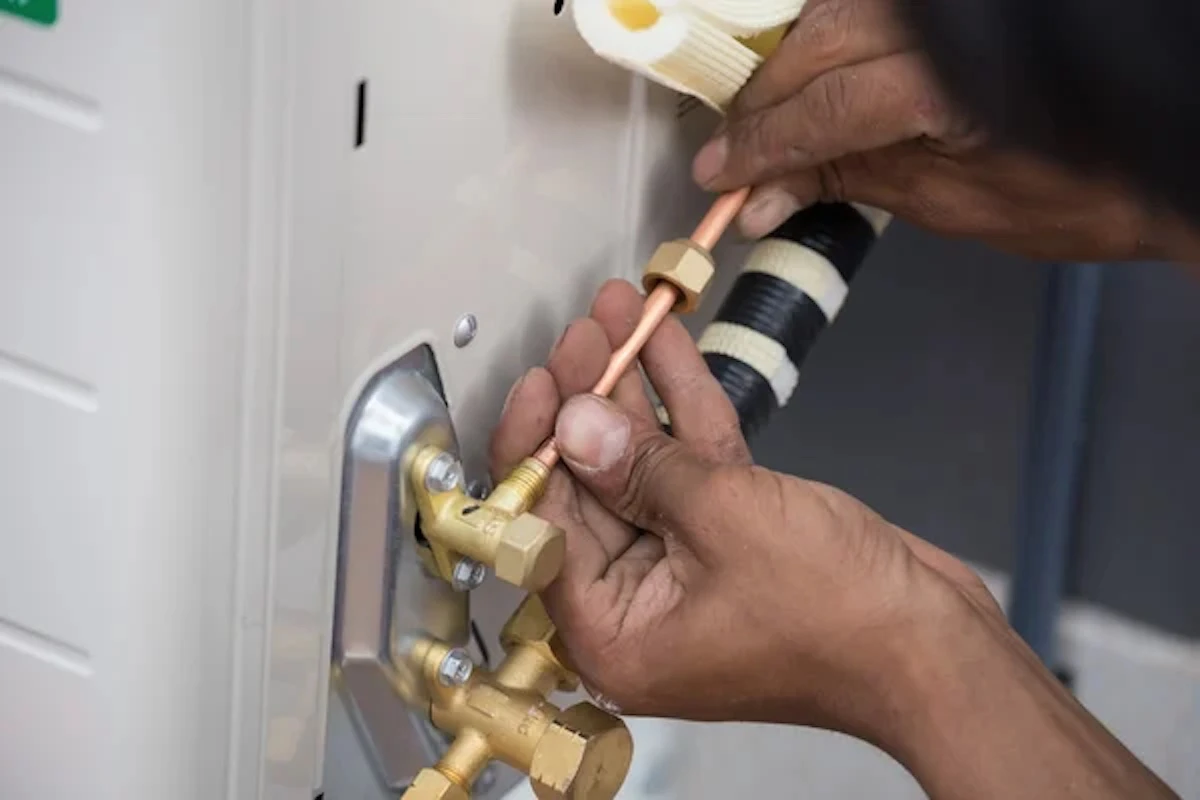
Flaring must be done perfectly because most of the refrigerant leakage problems come from the flare connection. If the flare is done poorly, you can cut it off and flare it again until satisfied. So, it is a good idea to leave some extra length of refrigerant pipes.
After the refrigerant pipes are connected, it is time to check for any leaks.
Step 5 – Perform a Leak Test
To perform a leak test, manufacturers often suggest you do a pressure test with nitrogen gas. It involves using nitrogen gas to pressurize the piping system to about 500-600 psi.
A pressure test is preferred when there is a brazing joint. Poor brazing work may give away when the mini split operates at high pressure. However, if you only have flare connections, you may not need to perform a pressure test to check for any leaks.
Instead, you may check for any leaks during the vacuum process. If that’s the case, skip this step and combine the leak test and vacuum work in the next step.
Step 6 – Vacuum the System
Vacuum or evacuation is a process to remove the moisture inside the refrigerant pipes. A mini split won’t work well when there is moisture in the system.
To vacuum the mini split system, bring out the manifold gauge set.
First, connect the yellow hose from the manifold gauge to the vacuum pump and the blue hose from the manifold gauge to the service port at the outdoor unit. Then, fully open the blue valve (low side) and fully close the red valve (high side) on the manifold gauge and start the vacuum pump.
You should see a rapid drop in the low side pressure (blue gauge) from positive to negative.
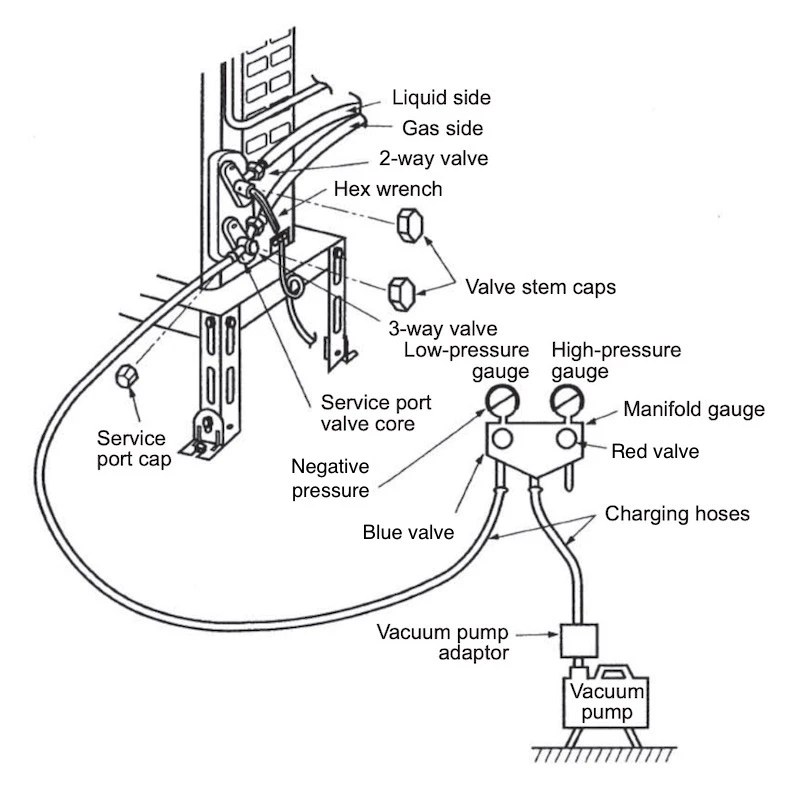
You may also use a micron gauge to measure and read the vacuum pressure. Manufacturers often recommend vacuuming the mini split system to below 500 microns.
Keep the vacuum pump running and the low side pressure at negative for about an hour.
Once the pressure is stabilized, fully close the blue valve on the manifold gauge and turn off the vacuum pump. Hold the vacuum pressure for a few minutes to confirm if there is no leak.
After that, check and measure the total length of the refrigerant pipes (one way) between the indoor and outdoor unit. If it exceeds the pre-charged length (usually 25 ft), an additional refrigerant charge is needed. See How to Charge a Mini Split? (Methods & Procedures).
Step 7 – Fit the Drain Pipe
While the vacuum process is ongoing, fit the drain pipe from the indoor unit to the nearest discharge outlet. The drain pipe should have a sufficient gradient to allow the condensate water to discharge via gravity.
In addition, there should not be any upward bends or kinks that can cause the condensate water to trap inside the drain pipe when the mini split is turned off. This is because slime will quickly build up which can lead to a clog.
Extend the drain pipe where necessary and make sure all drain pipes are insulated. To conceal the drain pipe, see my article Air Conditioner Condensate Drain Pipe Installation Basics.
Step 8 – Connect the Wires
In the meantime, install a new circuit breaker at the main panel and pull the power wires to the disconnect switch near the mini split outdoor unit. Then, connect the power wires from the disconnect switch to the outdoor unit.
For the indoor unit, the power wires and communication wires are pulled from the outdoor unit. Refer to the installation manual for the manufacturer’s recommended wire sizes, breaker sizes and best electrical practices.
To understand what it takes to connect the mini split wires, see my article How to Wire a Mini Split? (Full Wiring Diagram).
Step 9 – Release the Pre-Charged Refrigerant
Once you’ve done with the leak test and vacuum work, disconnect the vacuum pump. Then, tighten the service port and use soap water to check for any leaks. Next, remove the valve cap and release the pre-charged refrigerant using an Allen key.
Step 10 – Test Run
After the refrigerant is released, the drain pipe and the wires are all connected, engage the main power and switch on the mini split. You may use a multimeter to check for voltage stability before turning on the main power.
While the mini split is running, check for any abnormalities like low airflow, excessive noise and vibration. Refer to the installation manual (under the troubleshooting section) if anything comes up.
How Hard Is It to Install a Mini Split?
It is quite hard to install a mini split if you have no prior experience or are not a hands-on person. As shown above, there are many steps involved in a mini split installation. The refrigerant pipe flare connection is particularly challenging for the first timer.
Nonetheless, if you take the time to learn and complete each step at a time, it is possible for the first timer to install a mini split like a pro.
Can You Install a Mini Split Yourself (DIY)?
It is possible to DIY install a mini split by yourself. However, many manufacturers don’t cover the warranty if their mini splits are not installed by authorized personnel. So, you have a risk there.
Can You Install a Mini Split Without Drilling?
It is not possible to install a mini split without drilling. First, you need drilling for the indoor unit installation. Then, you need to drill a hole for the line to go outside.
Lastly, consider my Mini Split (eBook) if you want to know how can you use Mini Split in your house. If you still have doubt or not feeling confident enough, feel free to consult me.
Consultation Service
Ask me for HVAC advice such as brand selection, best model, benefits, features, placement, duct size, grille size, how to design, design check, verification and other HVAC related queries.


