Duct Insulation Guide: How-to, Selection & Thickness
Insulations are very important for air conditioning ducts. However, many people struggle to find information and guide on how to select and insulate ducts. So, I decided to write about it.
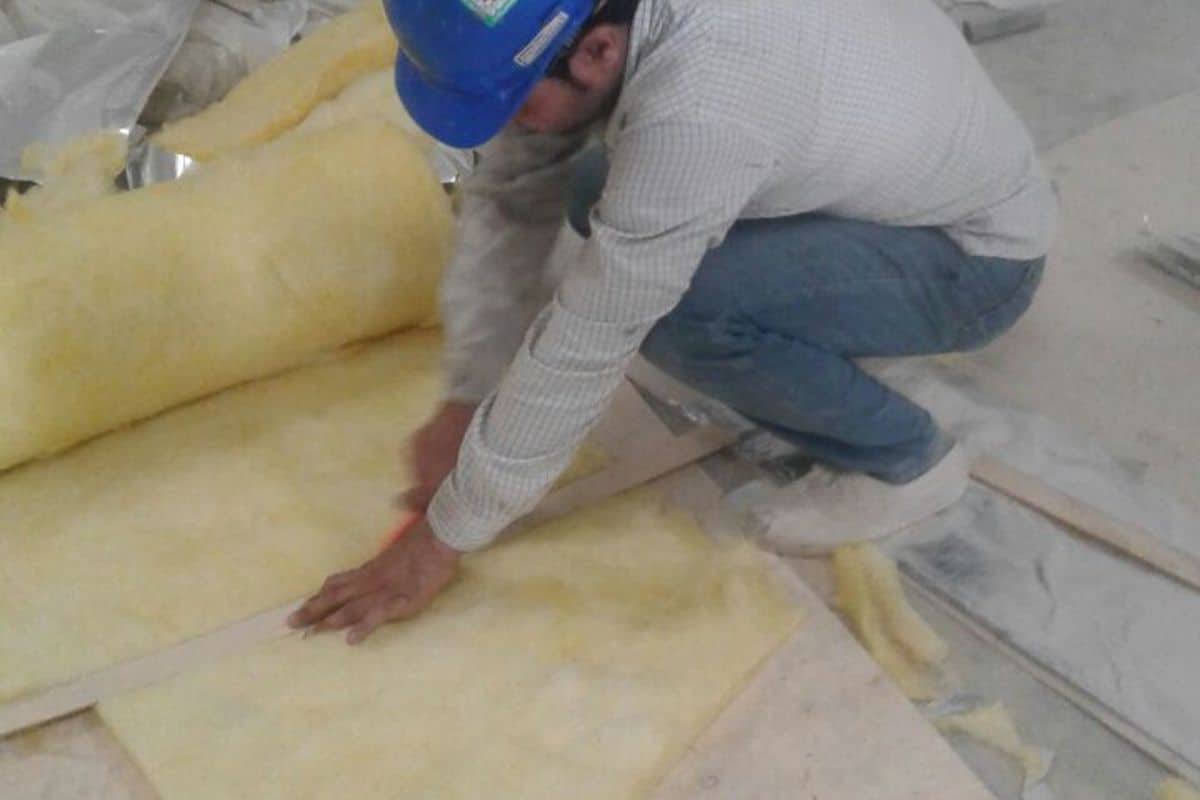
To insulate ducts, we need to select the type of duct insulation and determine the thickness of the duct insulation. Then, we need to measure the circumference of the duct, cut the insulation to the required length, apply adhesive to both the insulation and the duct and finally, wrap the insulation gently around the duct.
While the whole process seems to look simple but some people get confused about the thickness of duct insulation. To avoid buying the wrong insulation, it is necessary that we understand more about insulations.
How to Select the Type of Duct Insulation?
There are mainly two types of duct insulations; a) fiberglass and b) cross-linked polyethylene. Most of the time, fiberglass is the preferred choice due to its lower cost. Polyethylene (PE) is more expensive but it is safer and more aesthetically appealing.
If you are insulating ducts that are located in the attic or above the ceiling or inside the wall, fiberglass is your primary choice. But, if your ducts are under the ceiling where they are exposed and other people can see them, you may consider using PE insulations.
For more information about insulations in general, see my post on the 5 types of insulation used in air conditioning. If you want to know the details about duct insulations, see my post on the 4 common types of duct insulations.
By the way, if you want to learn more about mini split especially how to design it for your house, consider my Mini Split (eBook). You’ll learn what is Mini Split, how to choose and more importantly, spark more design ideas to improve the energy efficient of your house. But, if you need a second opinion or want someone to help you design, then you can consider my consultation service.
Consultation Service
Ask me for HVAC advice such as brand selection, best model, benefits, features, placement, duct size, grille size, how to design, design check, verification and other HVAC related queries.
How to Determine Duct Insulation Thickness?
Many people, including myself last time, have a hard time figuring out what is the necessary duct insulation thickness. Although there are some standards that require much thicker duct insulation to conserve energy, most people insulate ducts to prevent condensation.
To prevent condensation on ducts, the external surface temperature of the duct must not approach and fall beyond the dew point of the air. Hence, the dew point of air is not a constant and it is depending on temperature and relative humidity. In other words, it is geographical location-dependent.
When calculating the dew point, we should use the initial temperature and relative humidity values and not the desired room conditions value because condensation can happen right after you switch on the air conditioner.
For example, I’m living in Malaysia. Usually, the room condition without air conditioning in the afternoon is around 82°F (28°C) and 85% relative humidity. So, the dew point is 77°F (25°C) and thus, I must not let the external duct surface temperature approach 77°F (25°C). The best is to target the external duct surface temperature at around 3.6°F (2°C) above the dew point temperature.
So, everyone should have their own dew point value and you can calculate your dew point value using this simple online dew point calculator (link to http://www.dpcalc.org).
After finding the dew point, we need to estimate the supply air temperature inside the duct. Typically, air conditioners supply air at 18°F (10°C) below the temperature set on the thermostat. For example, if you set your thermostat at 77°F (25°C), the supply air temperature should be around 59°F (15°C).
However, the supply air temperature should not exceed 61°F (16°C) under normal circumstances. Otherwise, your house may be too humid and it may be a sign of oversized air conditioners or other problems.
For concealed ducts such as above the ceiling and inside the wall, find the duct insulation thickness based on the temperature difference between the dew point and the supply air temperature using the below table:
| Temperature Difference | Recommended Thickness |
|---|---|
| 30°F (16.7°C) | 1″ (25mm) |
| 35°F (19.5°C) | 1″ (25mm) |
| 40°F (22.2°C) | 1-1/2″(38mm) |
| 45°F (25.0°C) | 1-1/2″ (38mm) |
| 50°F (27.8°C) | 2″ (50mm) |
So, if my dew point is 77°F (25°C) and the supply air temperature is 59°F (15°C), the temperature difference is 18°F (10°C) which is below 30°F (16.7°C). Therefore, my duct insulation should be 1″ (25mm) thick.
Most duct insulations have a K value of 0.24 btu.in/ft2/hr/°F which is the thermal conductivity of the insulation at 1″ thick. If the insulation is 2″ thick, divide the K value with the thickness to get the corresponded thermal conductivity. For instance, 0.24 btu.in/ft2/hr/°F divided by 2 inch is 0.12 btu/ft2/hr/°F.
The thicker the insulation, the lesser the energy can travel through it.
However, some insulations are specified in R value and many people have a better understanding when buying insulations based on R value. To convert the K value into R value, divide 1 by K value. For example, 1 divided by 0.12 btu/ft2/hr/°F is 8.33 ft2.hr.°F/btu which is equivalent to R8.
R = 1 / K
In other words, R value is dependent on the thickness and the thermal conductivity of the insulation. Many houses in the United States are using R-8 duct insulations. However, if the duct insulations have only 0.24 btu.in/ft2/hr/°F of thermal conductivity and they are only 1″ thick, the duct insulations are actually R-4 only. To achieve R-8, you either use 2″ thick or use better insulations that have a lower thermal conductivity.
In terms of SI unit, the K value 0.24 btu.in/ft2/hr/°F is equivalent to the K value 0.035 W/mK in SI unit. At 25mm, the K value is 0.035 W/mK divided by 0.025 m which equals 1.4 m2K/W. The R value expressed in SI unit is better known as RSI value. So, to convert the K value into RSI value, divide 1 by 1.4 m2K/W which equals R-0.71 (RSI).
Then, to convert from RSI to R value used by the United States or Imperial unit, multiply the RSI value by 5.678. So, RSI 0.71 is equivalent to R-4.
According to ASHRAE Standard 90.1-2007, R-4 insulation is sufficient for most ducts located in unconditioned spaces such as above the ceiling and inside the wall. However, most ducts located on the attic above the insulated ceiling should use R-6 insulation.
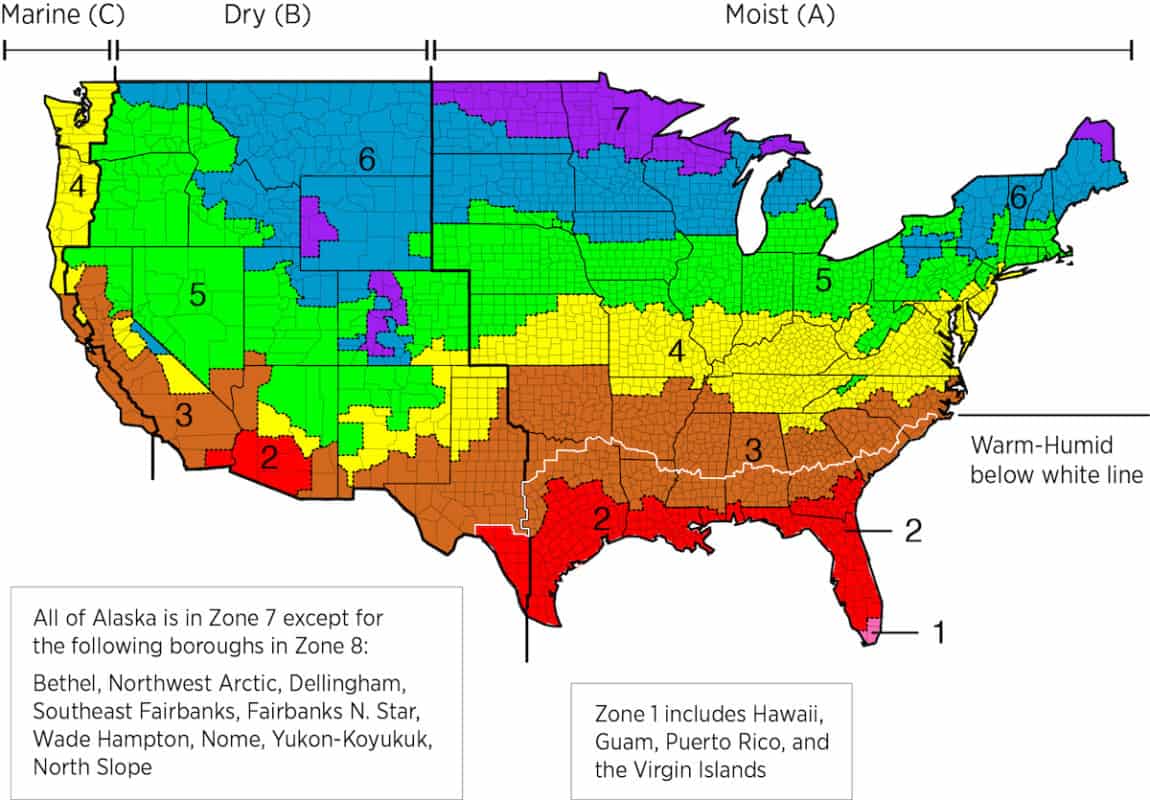
Below is the recommended duct insulation R value derived from ASHRAE Standard 90.1-2007 based on different climate zones in the United States:
| Climate Zone | Attic Above Insulated Ceiling | Unconditioned Space |
|---|---|---|
| Zone 1 | R-8 | R-4 |
| Zone 2 | R-6 | R-4 |
| Zone 3 | R-6 | R-4 |
| Zone 4 | R-6 | R-4 |
| Zone 5 | R-6 | R-4 |
| Zone 6 | R-6 | R-4 |
| Zone 7 | R-6 | R-4 |
| Zone 8 | R-8 | R-6 |
| Climate Zone | Attic Above Insulated Ceiling | Unconditioned Space |
|---|---|---|
| Zone 1 | R-8 | R-4 |
| Zone 2 | R-6 | R-4 |
| Zone 3 | R-6 | R-4 |
| Zone 4 | R-6 | R-4 |
| Zone 5 | R-6 | R-4 |
| Zone 6 | R-6 | R-4 |
| Zone 7 | R-6 | R-4 |
| Zone 8 | R-8 | R-6 |
Many people were misled by the R value stated by insulation sellers. There are several duct insulations sold on Amazon that claimed to be R-8 insulations. However, their thickness is only 1/2″ or 1/4″.
If we reverse calculate the R value, the thermal conductivity (K value) of the 1/4″ thick insulation is 0.156 btu.in/ft2/hr/°F which is most likely impossible because some of the best fiberglass insulation thermal conductivity is around 0.24 btu.in/ft2/hr/°F only. Even John Manville datasheet shows a maximum of 0.24 btu.in/ft2/hr/°F only.
Therefore, when shopping for duct insulations, you should be extremely skeptical of the claimed R value for anything below 1″ thick. In commercial air conditioning, our minimum duct thickness is always 1″. If the surrounding temperature is higher, we usually use 2″ thick fiberglass insulations.
To avoid you buying the wrong duct insulation, I recommend you get this fiberglass insulation if you plan to buy it on Amazon. Once you have the insulation, you’ll need to know how to put it on your duct.
How to Install Fiberglass Insulation on Duct?
Before you proceed to stick the fiberglass insulation on your ducts, it is very important that you understand the characteristic of insulations in general. In case you’re wondering, flexible ducts do not require external insulations as they come pre-insulated.
For most insulations, you don’t want to compress or reduce the thickness of the insulations as much as you possibly can. The thermal conductivity or insulating capability of insulations is dependent on their final thickness after installation. If you compress 1″ insulations to 1/2″ thick, you essentially halved the insulating capability of the insulations.
Furthermore, you must not allow air to stay in between insulations and ducts. You need to gently press the insulations onto the external surface of your ducts in all directions. Typically, we apply dedicated insulation glues or adhesives on both the insulations and the ducts before we gently press insulations against ducts.
When there is air stuck in between insulations and ducts, the air will condense into water droplets and wet the insulations which reduce the thickness of the insulations thereby reducing the performance of the insulations.
Thirdly, you should wipe your ducts with wet towels to ensure there is no dust and dirt stays on the surface of the ducts before putting on the insulation so that the insulations will stick onto the ducts. If there are leftover insulations on the duct surfaces, scrub them off.
The above three things are essentials and basics when insulating ducts, pipes and almost everything. Now, let’s go through the step by step on how to install fiberglass insulations on ducts.
1. Measure the Circumference of the Duct
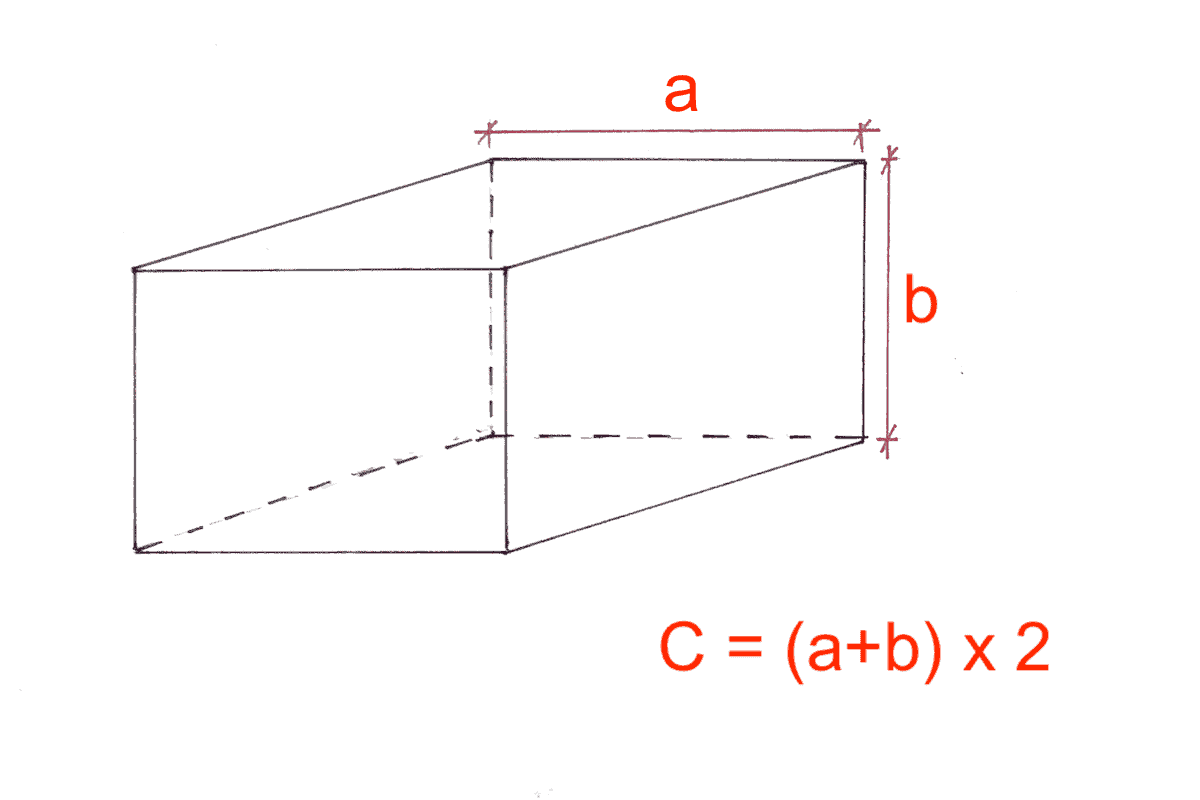
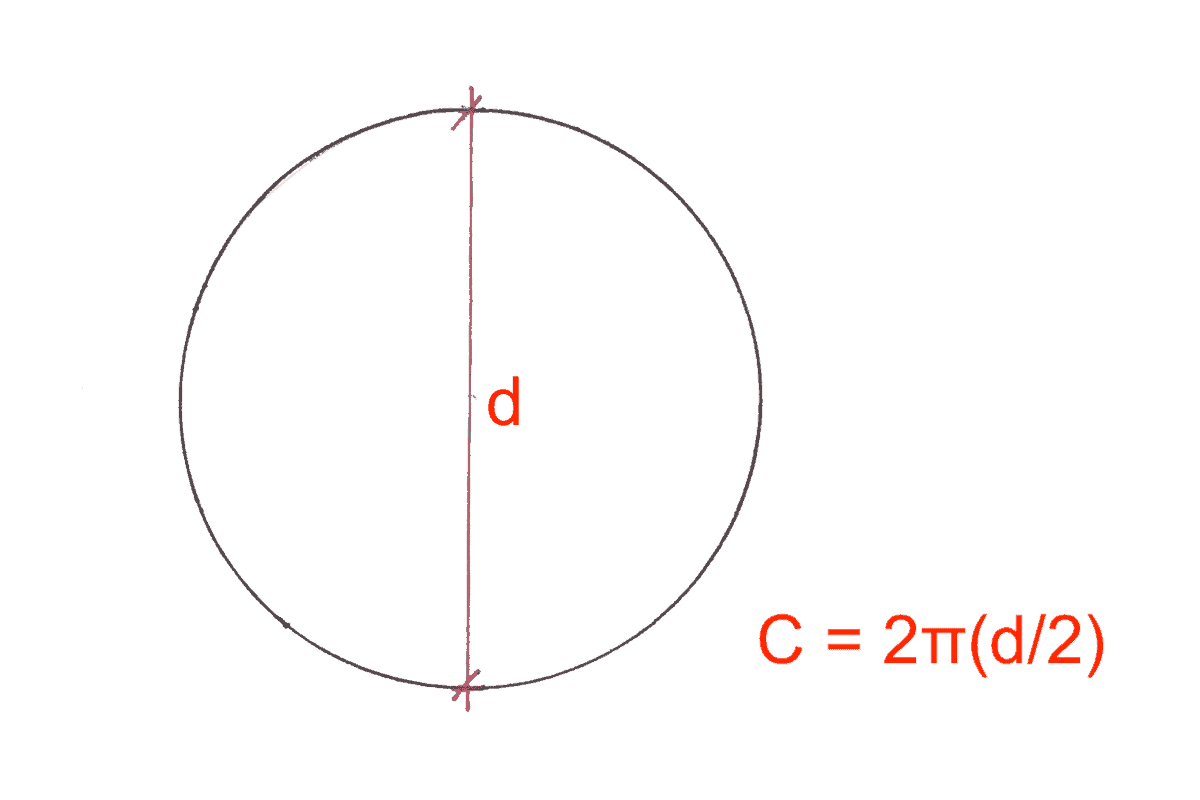
Measure the circumference of your duct. For rectangular ducts, simply add the width and height and then, multiply it by 2. For round ducts, measure the diameter, divide it by two and multiply it by 6.28 (round circumference formula is 2πr). For example, if I have a 24×16″ duct, my duct circumference is (24+16)x2=80″.
2. Cut the Insulation to the Required Length
Unroll the insulation and cut it to the required length according to the duct circumference you’ve just measured. For example, my duct circumference is 80″, so I measure 80″ and cut the entire insulation.
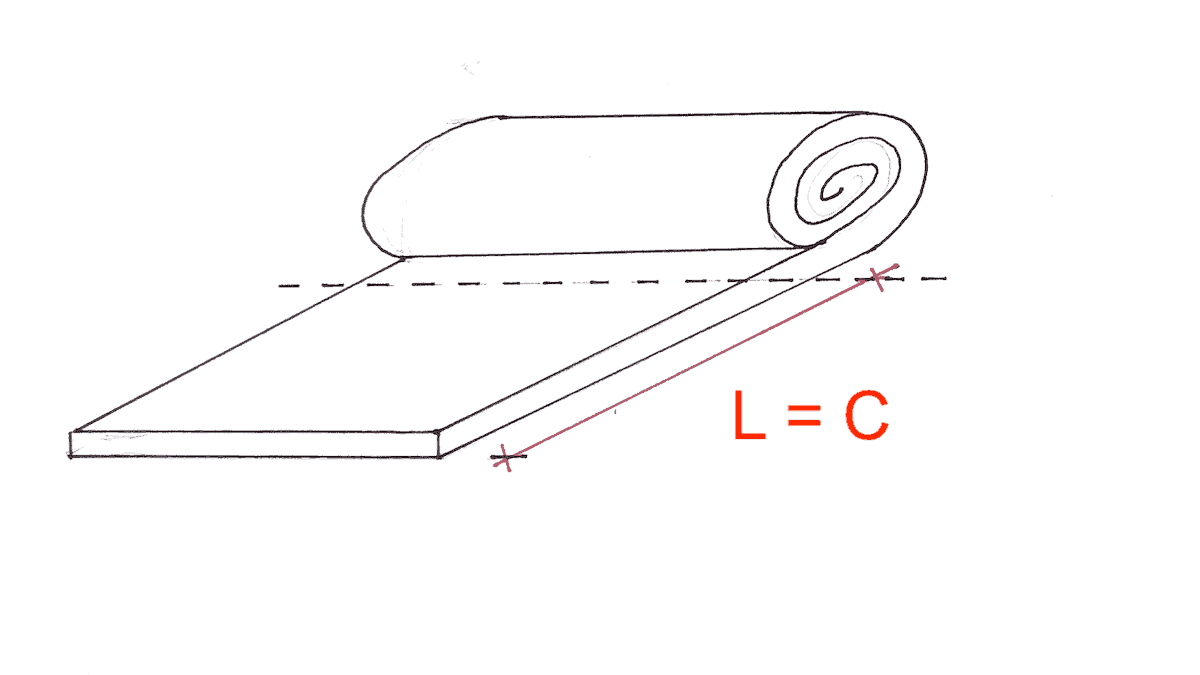
The fiberglass insulation I recommended above has a width of 48″. So, when I cut it at 80″ length, the fiberglass insulation is now measured at 80×48″ where 80″ is used to wrap the duct and 48″ becomes the length of the duct.
3. Apply Adhesive on Both the Duct and the Insulation
Once you cut the insulation, put adhesive on both the duct and the insulation. If your insulations have a layer of aluminium foil, you must put adhesive on the fiberglass instead of the aluminium foil. The aluminium foil is the new external appearance of your ducts.
If your ducts are hung up high, using the spray adhesive I recommended above is very handy as glue (liquid form) will drip. In projects, we always use insulation glue (liquid form) instead of spray because we insulate our ducts on the floor and glue is more cost-effective than spray.
4. Gently Wrap the Insulation around the Duct
Allow some time for the adhesive to settle according to the adhesive instruction manual. Once done, get a helper to help you wrap the insulation around the duct. The insulation at the corner of the duct may be compressed more and it is fine.
If you’ve measured the duct circumference and cut correctly, the insulation should fit perfectly on the duct, with little to no extra length. Gently press the insulation against the duct to let it stick onto the duct more.
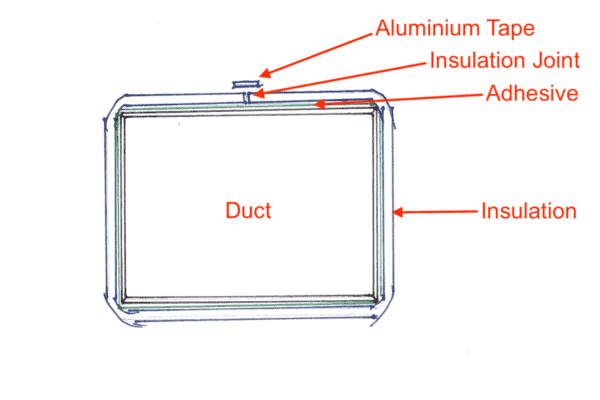
For duct joints, it is fine to wrap them with fiberglass insulations. If you’re using PE insulations (cross-linked polyethylene foam), you’ll need to cut and wrap the duct joints separately.
5. Tape the Insulation Joint
Once you’ve done wrapping the insulation around the duct, you can use the aluminium tape I recommended above to seal the gap between the insulation joint. The tape should be wide enough for the joint. Usually, we use about 2″ wide aluminium tape. I don’t recommend you use other types of tapes for duct insulations.
6. Final Inspection
If you apply the adhesive and wrap the insulation properly, the insulation should not appear to be sagging from the bottom of your ducts. The final product should be something this:
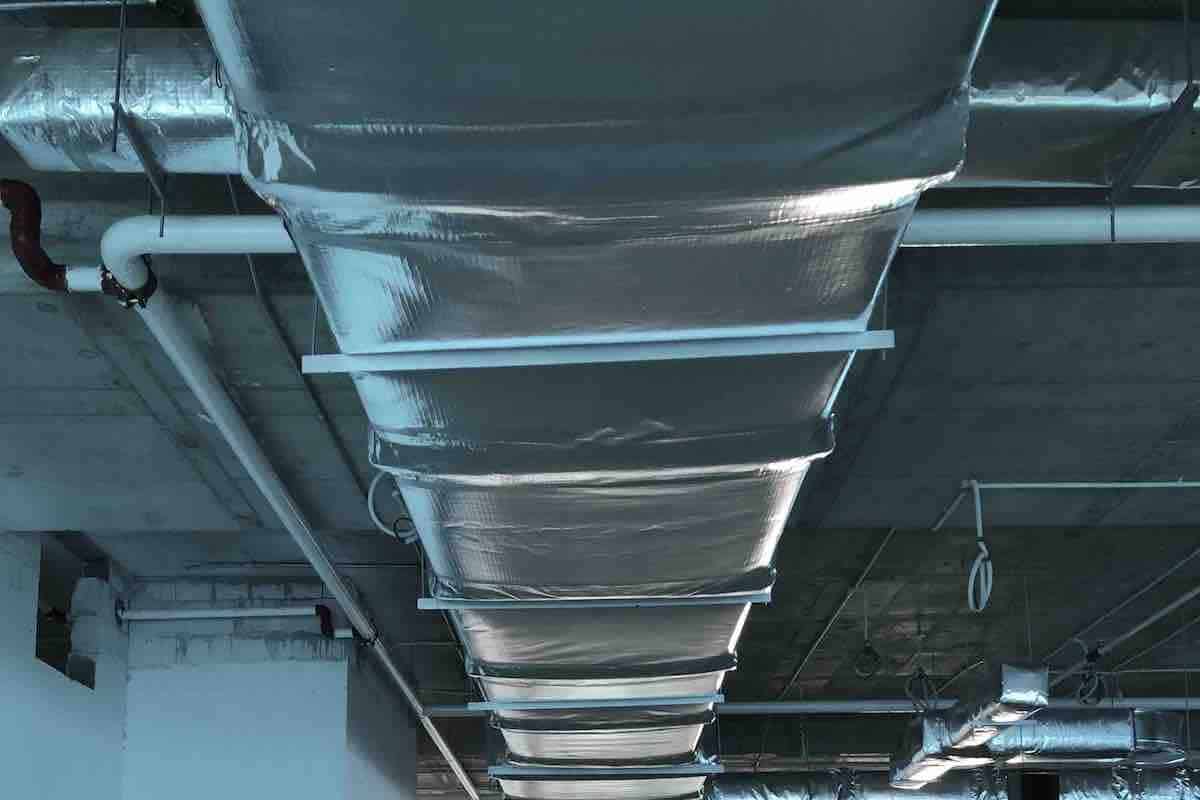
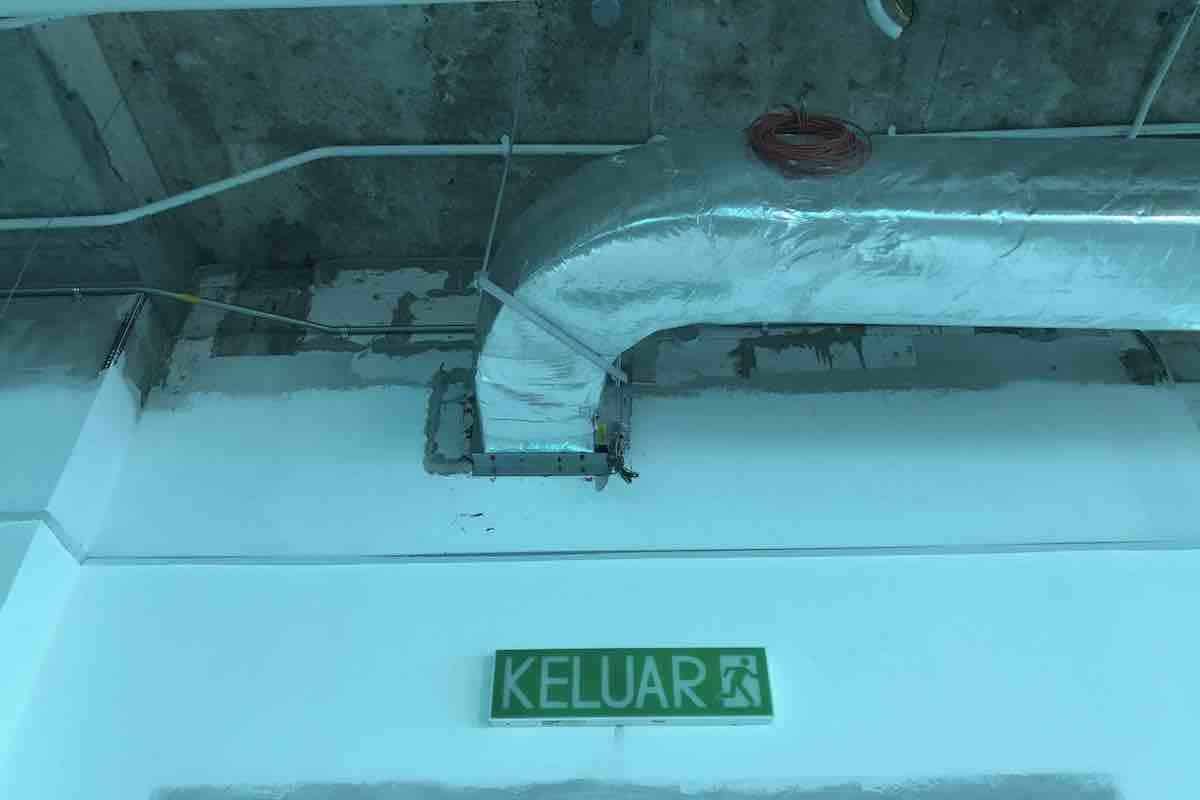
Once you’re done with the first section, proceed to the next section accordingly. There will be joints in between each section and you’ll need to tape them to seal the fiberglass.
Installation of Polyethylene Duct Insulation
If you are using or thinking of using polyethylene duct insulations, see this installation video from Trocellen. It is very similar to fiberglass insulation but with extra length for overlapping.
Lastly, consider my Mini Split (eBook) if you want to know how can you use Mini Split in your house. If you still have doubt or not feeling confident enough, feel free to consult me.
Consultation Service
Ask me for HVAC advice such as brand selection, best model, benefits, features, placement, duct size, grille size, how to design, design check, verification and other HVAC related queries.
If you have anything to add (or ask) about this topic, leave a comment down below!


