Mini Split Placement: Best Location for Mini Splits (w/ Photos)
The indoor and outdoor units of a mini split must be installed at a location where there is sufficient space for the air to move around. Else, the performance of the mini split may drop and the warranty may even be avoided. So, where should you put your mini split?
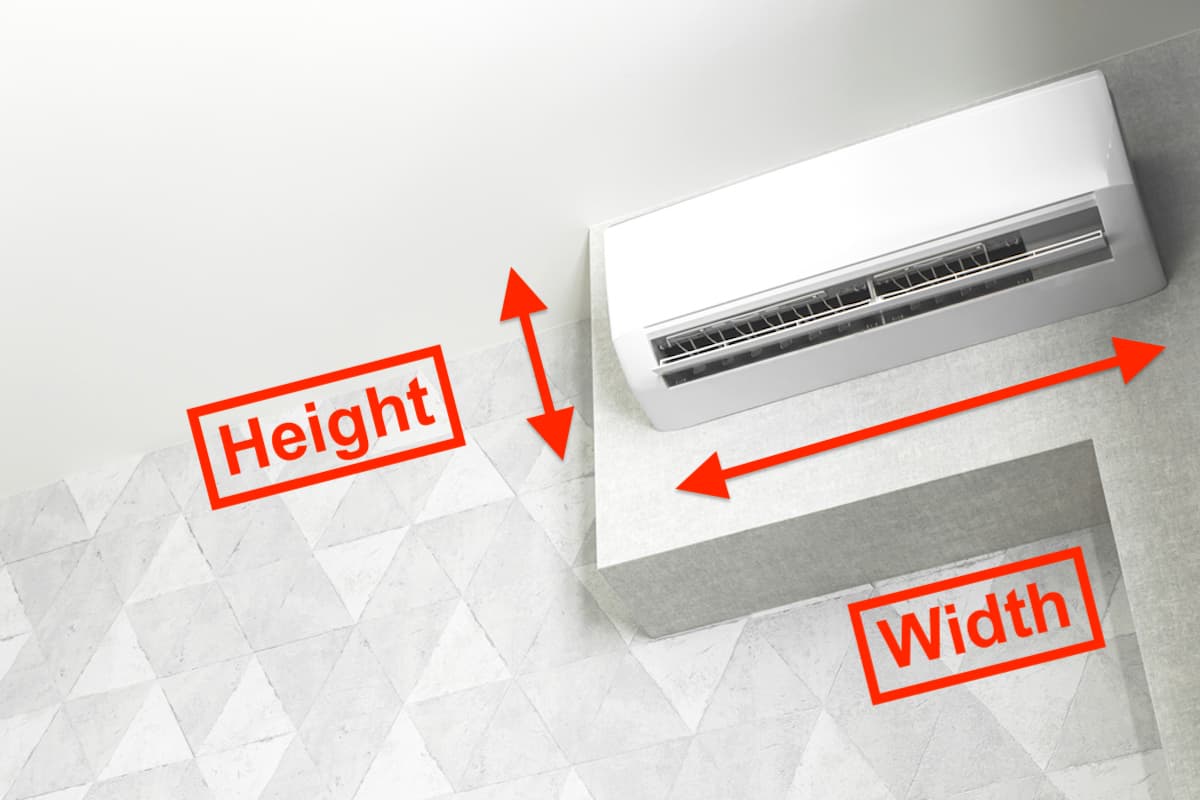
Generally, the indoor unit of a mini split should be installed at a height of about 7-8 ft above the floor with a minimum clearance of 3 inches from the ceiling. Whereas the back of the outdoor unit should have a clearance of 4 inches from the wall.
There are several locations where mini splits are typically installed at. Each of these locations has its pros and cons with regard to the installation, maintenance and aesthetic of the mini split.
I’ve dealt with hundreds of mini split installations throughout my career. Hence, I summarized some of the best locations to install the mini split indoor and outdoor units to help you make a better decision. I also provided some photos here to help you visualize.
Mini Split Clearance Requirements
Every mini split has clearance requirements. It is known to leave a sufficient gap between the indoor unit and the ceiling for the return air, and also the outdoor unit needs to be away from the wall to avoid obstructing the airflow.
In addition, the side, bottom and front of a mini split also need to have clearance to ensure optimal performance, and ease of installation and maintenance.
Although some mini splits require more clearance than others, the clearance needed for a typical ductless (wall-mounted) mini split is generally as the below diagram:
Each and every mini split has its own clearance requirements. The clearance is required by the manufacturer and it is usually found in the installation manual of your specific mini split.
Mini Split Indoor Unit Placement
The indoor unit of a mini split needs at least 3 inches of gap from the ceiling. Across all mini split models and brands, the minimum space between the indoor unit and the ceiling is 3 inches.
Placing the indoor unit 8 inches or more below the ceiling yields the best performance.
Meanwhile, the height of the indoor unit should be at least 6 ft from the floor. Between the clearance from the ceiling and the height from the floor, prioritize the clearance from the ceiling as it is crucial for the return air and ultimately the performance of the mini split.
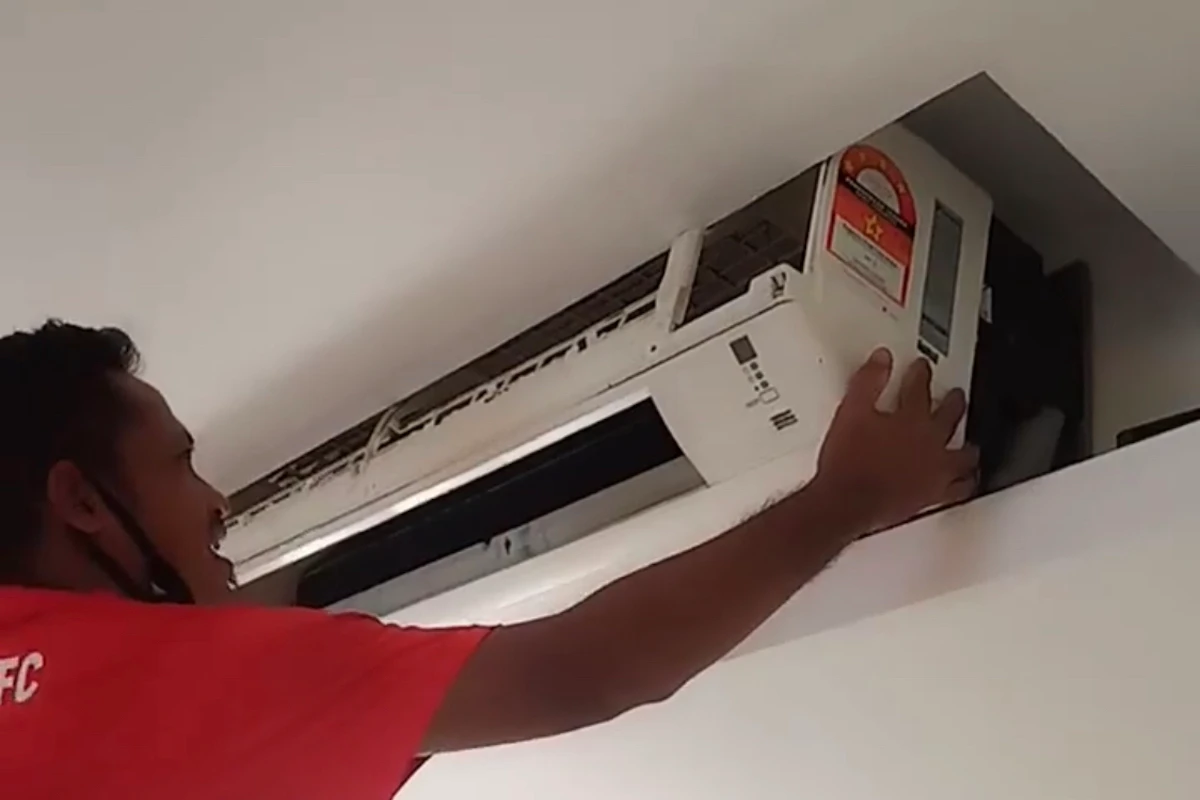
Whenever possible, give more space between the indoor unit and the ceiling to ease the maintenance (cleaning) work. It is best if the top part of the indoor unit is visible and that’s about 8 inches from the ceiling.
As for the side of the mini split indoor unit, it is recommended to have at least 2 inches of space so that the cover can be easily removed for installation and maintenance purposes.
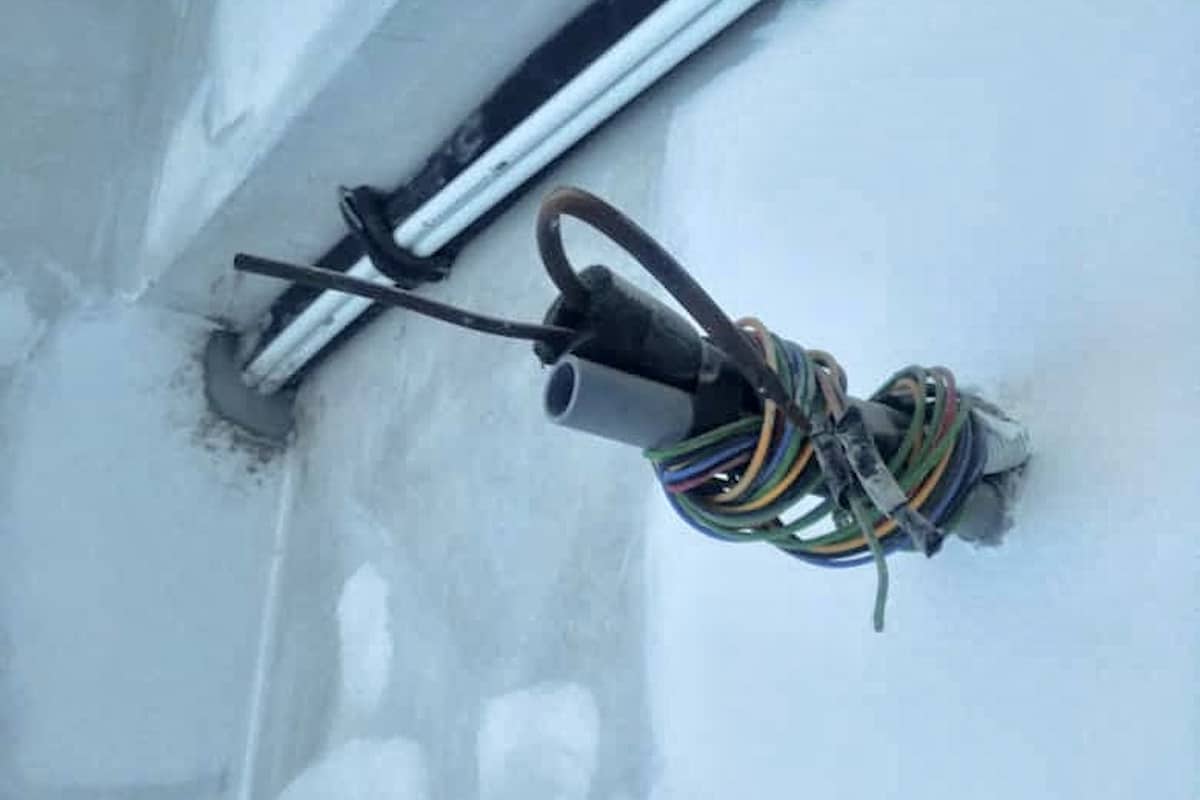
Check if the indoor unit requires a condensate pump to assist the drain. If so, make sure to leave sufficient space below (or beside) the unit for the drain pump.
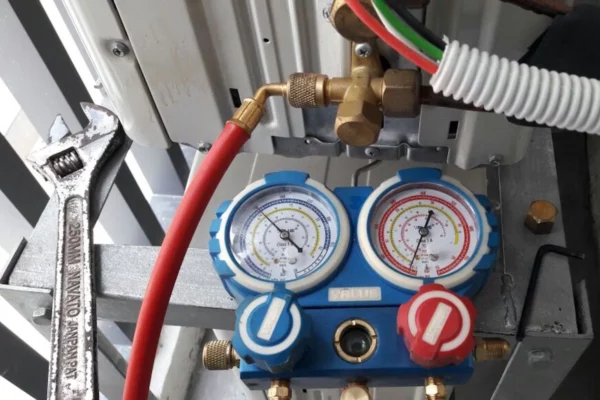
If you’re not familiar with condensate pumps for mini splits. I encourage you read my article about when do you need a condensate pump for your mini split. I also explain where you should install the condensate pump in the article.
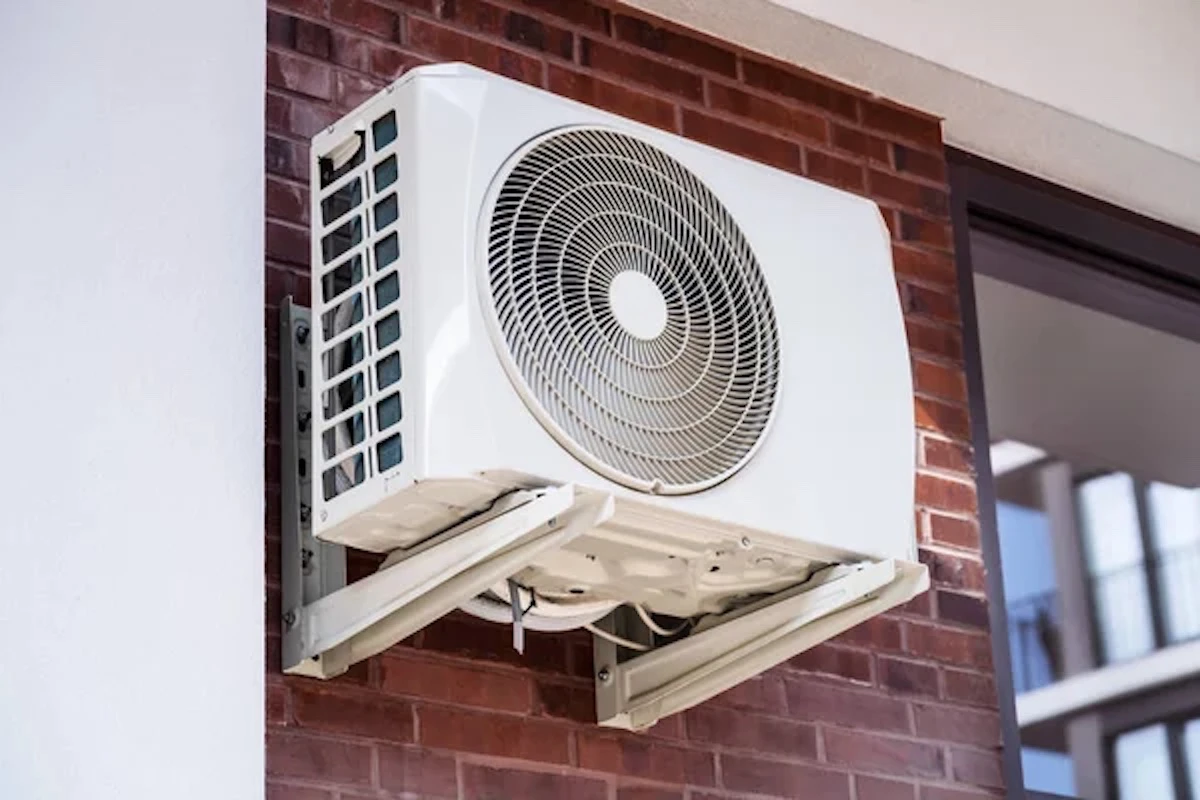
Mini Split Outdoor Unit Placement
The outdoor unit (condenser) of a mini split requires a minimum distance of 4 inches from the wall. The minimum space needed to carry out the service and maintenance work is 14 inches on the side of the piping and wiring connections.
However, based on my experiences, a clearance of about 2 to 3 ft on the piping and wiring side of the outdoor unit is best for service access.
If the front of the outdoor unit has a wall, it needs to be at least 14 inches away from the outdoor unit in order not to obstruct the discharge air.
Also, make sure to have a minimum clearance of 4 inches above the outdoor unit.
The clearance requirements for the mini split outdoor unit require more explanation as it is also depending on the object surrounding the outdoor unit.
For example, if the outdoor unit is installed near the exterior wall of a house, then the only clearance needed is between the wall and the outdoor unit which is about 4 inches.
But, if there is a wall in front of the outdoor unit, then the space between the wall and the outdoor unit must also be taken into account.
Another instance where you need to be extra cautious is when you have more than one outdoor unit. In the case where you need to put the outdoor units back-to-back, make sure you leave enough space at the back of each outdoor unit.
Also, if both of the outdoor units are facing each other, more space is required between them to ensure hot air short cycle does not happen.
If several outdoor units are required to be installed side-by-side, make sure the clearance for installation and maintenance is considered. Do not put them close to each other.
Nonetheless, not all mini splits have the same clearance requirements. Different mini splits have different clearance requirements. Those that have a greater airflow (capacity) may require more clearance.
So, it is important to place your mini split according to the manufacturer’s requirements.Otherwise, your warranty can be avoided.
Refer to the installation manual for the clearance requirements of your particular mini split.
Distance Between the Indoor and Outdoor Unit of a Mini Split
Every mini split has a maximum refrigerant pipe length. Typically, the maximum refrigerant pipe length between the indoor and outdoor unit of a mini split is 65-80 ft.
As for the height difference between the indoor and outdoor unit, it is typically 50-80 ft depending on the model and capacity.
Mini splits come pre-charged with refrigerant. Usually, the pre-charged amount is equivalent to 25 ft of refrigerant pipe length. Meaning, if the refrigerant pipe length exceeds 25 ft, additional refrigerant is needed.
So, if you don’t want to add more refrigerant, you should limit the distance between the indoor and outdoor unit of your mini split to approximately 15 ft. This accounted the indoor unit at 8 ft above the outdoor unit and another 2 ft for buffer/spare.
If the outdoor unit is installed on the roof, the maximum height difference to the indoor unit is about 3 floors below the outdoor unit given that each floor is 14 ft tall.
By the way, if you want to learn more about mini split especially how to design it for your house, consider my Mini Split (eBook). You’ll learn what is Mini Split, how to choose and more importantly, spark more design ideas to improve the energy efficient of your house. But, if you need a second opinion or want someone to help you design, then you can consider my consultation service.
Consultation Service
Ask me for HVAC advice such as brand selection, best model, benefits, features, placement, duct size, grille size, how to design, design check, verification and other HVAC related queries.
13 Considerations When Placing a Mini Split
Apart from the clearance requirements, refrigerant pipe length and height difference, there are a few more considerations with regard to the location of the mini split indoor and outdoor units:
- The outdoor unit should be leveled.
- Watch out for anything near the outdoor unit that can obstruct the airflow.
- The outdoor unit should not be located where noise can be an issue. For instance, too near a bedroom or study room.
- Put the mini split outdoor unit away from direct sunlight whenever possible to help on efficient though it is minimal.
- If a strong wind is expected to blow into the air discharge side of the outdoor unit from the front, there is a risk that the fan may be damaged. In this case, change the orientation or location of the outdoor unit.
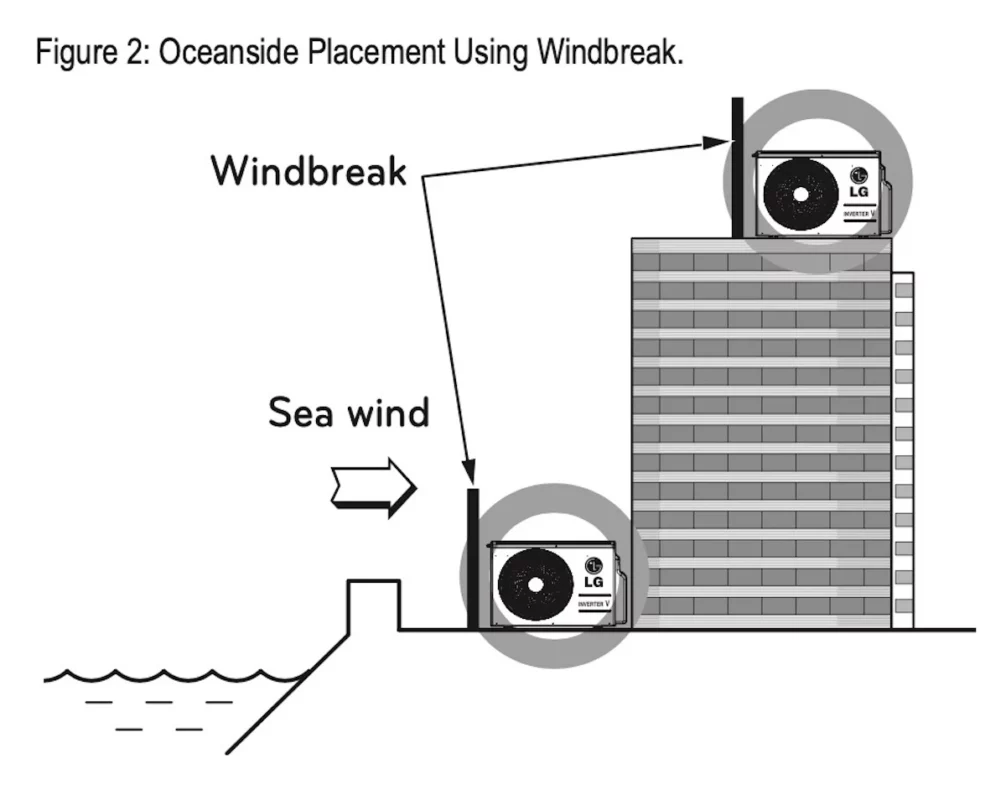
- For seaside applications, salty seawater (wind) can erode and damage the outdoor unit. Use either the building as shield or install a windbreak to protect the outdoor unit.

- For normal application, raise the outdoor unit by an inch or two to avoid water from ponding and contacting the outdoor unit for a prolonged period of time.
- For cold climate applications, raise the outdoor unit by 4 inches or more using a plinth or bracket to ensure snow does not pile up on the outdoor unit.
- The drain pan inside the indoor unit of a mini split has sufficient gradient for the condensate water to flow properly. So, the indoor unit should be leveled.
- The indoor unit should not be installed near a heat source (eg: microwave, cooking stove) as condensation may occur on the surface of the indoor unit and the oil (steam) may clog the drain pipe.
If you need a mini split in your kitchen, I strongly suggest you read my article about where to place a mini split in the kitchen to make sure that you get the right position.
- The indoor unit should not be positioned such that it blows cold air directly onto the occupants.
- Avoid putting the indoor unit opposite the door as cold air may escape the room, leading to inefficient cooling.
- Try not to put the indoor unit above any valuable items as drain pipe overflow can cause damage.
10 Best Location for Mini Splits
With all the above limitations and requirements, here are some of the best locations to install your mini split. For each location, I’ll explain the pros and cons, and attach a few photos for your reference.
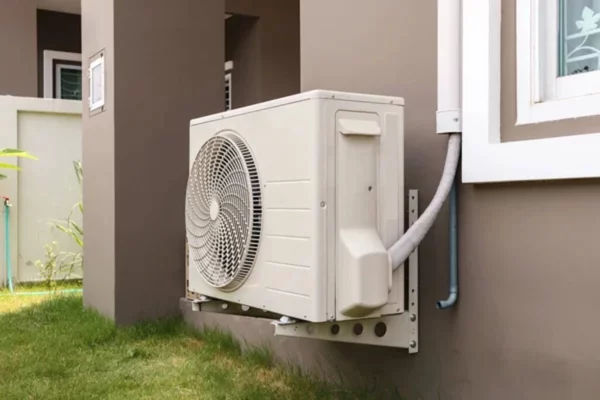
1. Put the outdoor unit on the ground
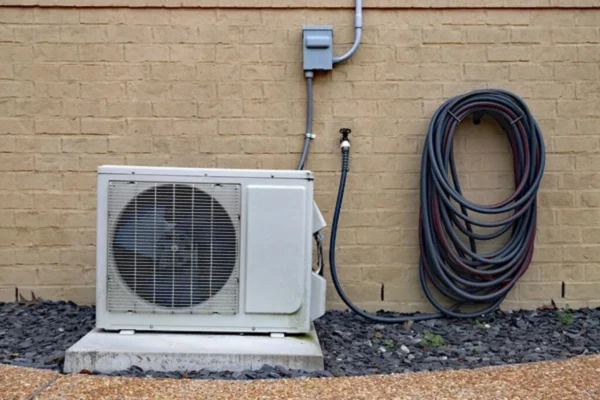
Pros
- Easy installation and maintenance
Cons
- Prone to airflow obstruction
- A concrete plinth is needed
The most common location for the mini split outdoor unit is on a solid base (concrete plinth) or a standing bracket on the ground. This location is easy for installation and maintenance.
However, if you have tight space, this location requires you to be more careful with the clearance requirements. In addition, you also need to cast a concrete plinth which is additional work.
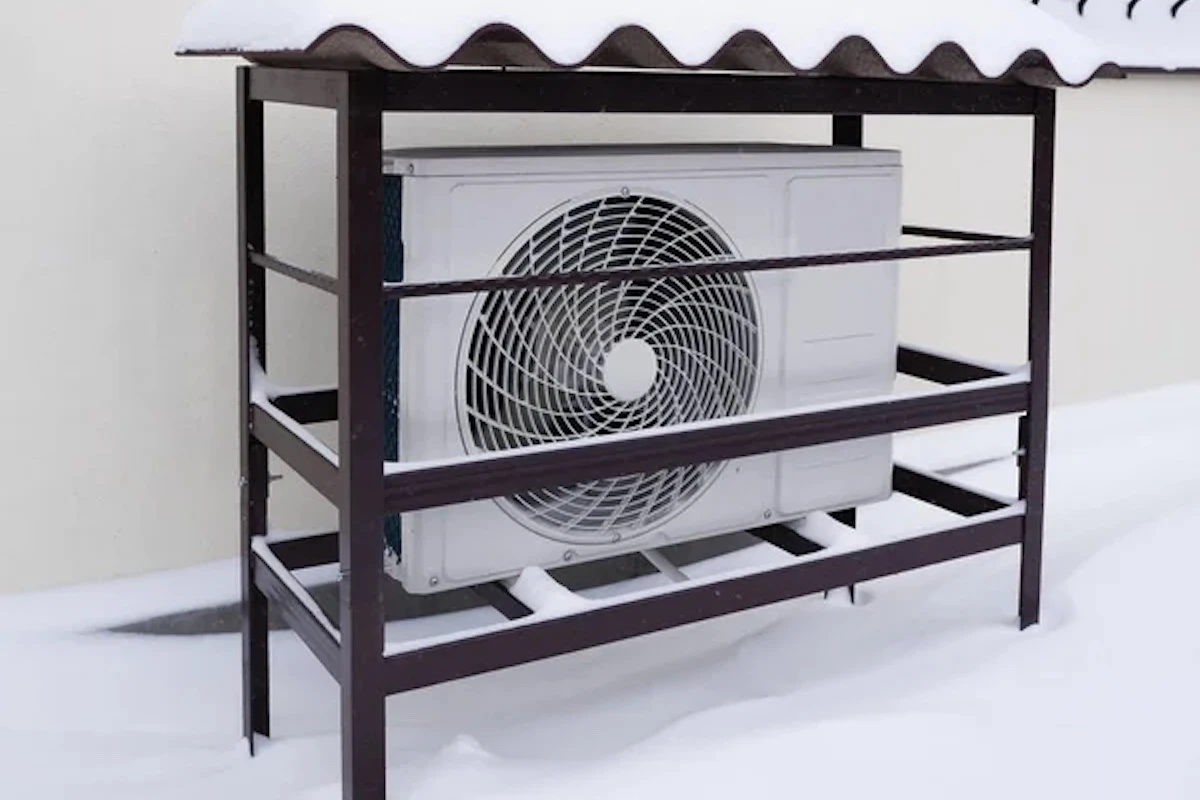
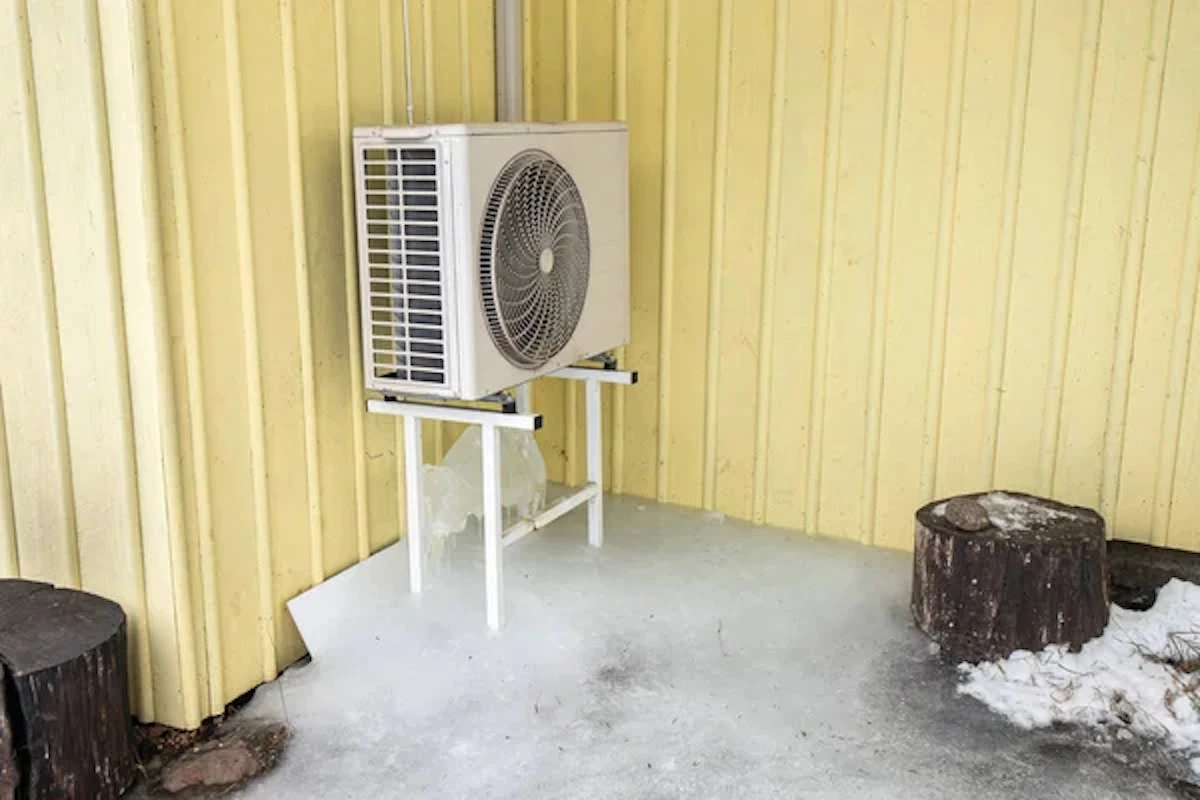
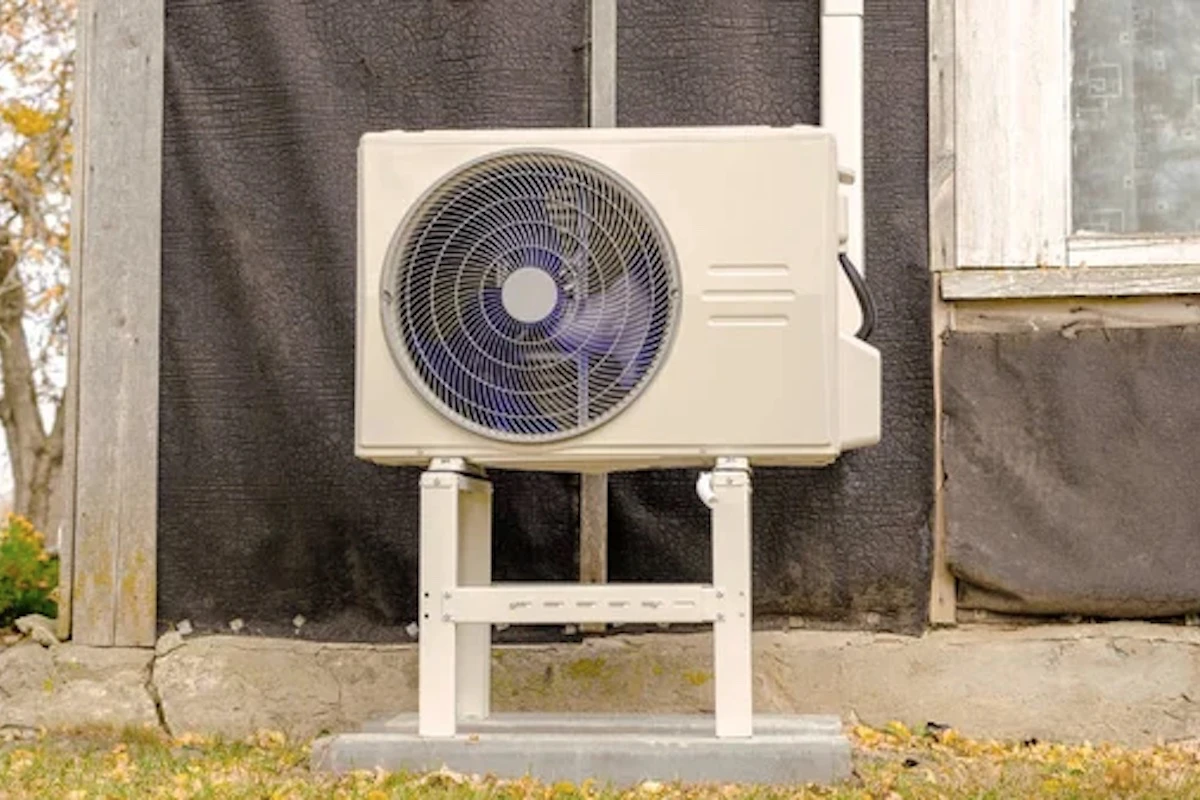
If you’re in a cold climate, make sure to raise the outdoor unit by at least 4 inches. In addition, make sure the drain water does not flow to walkways as it can freeze and become slippery.
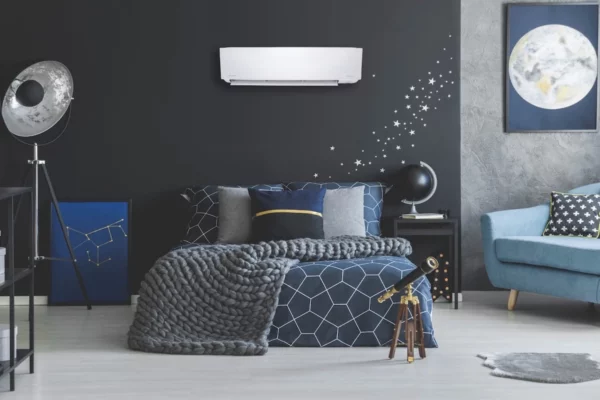
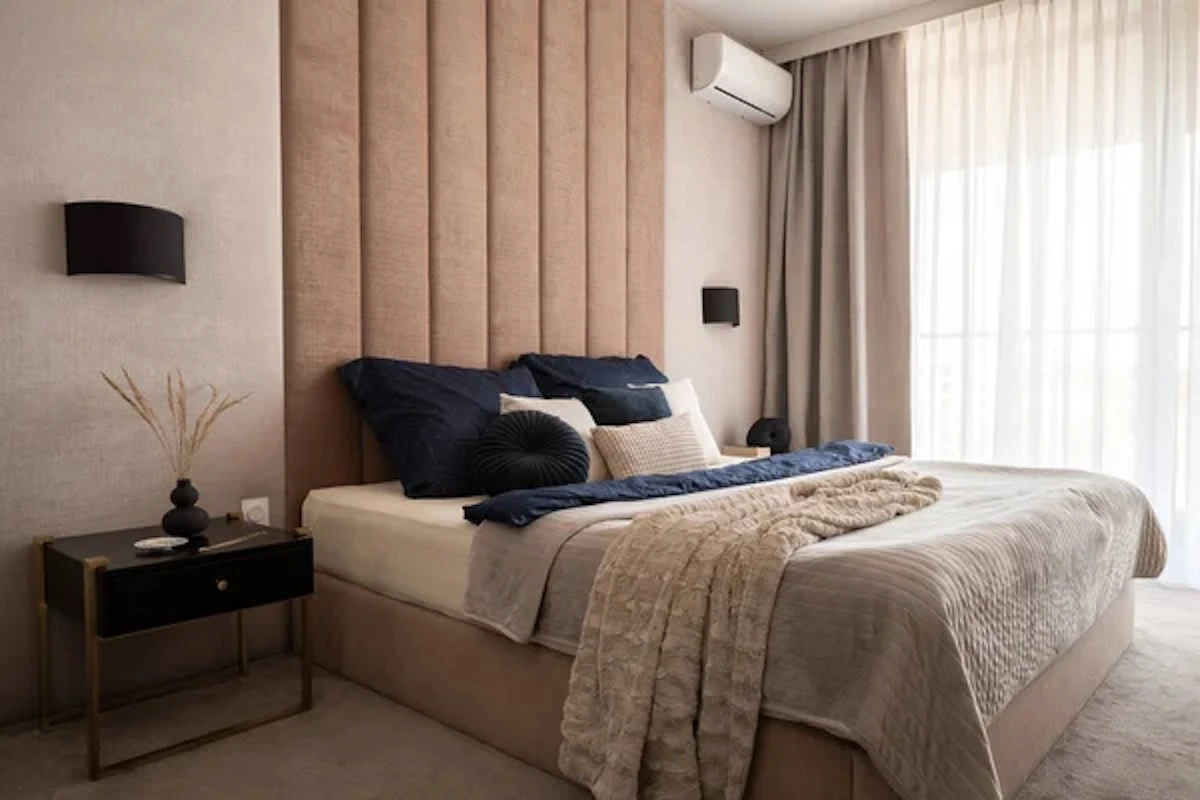
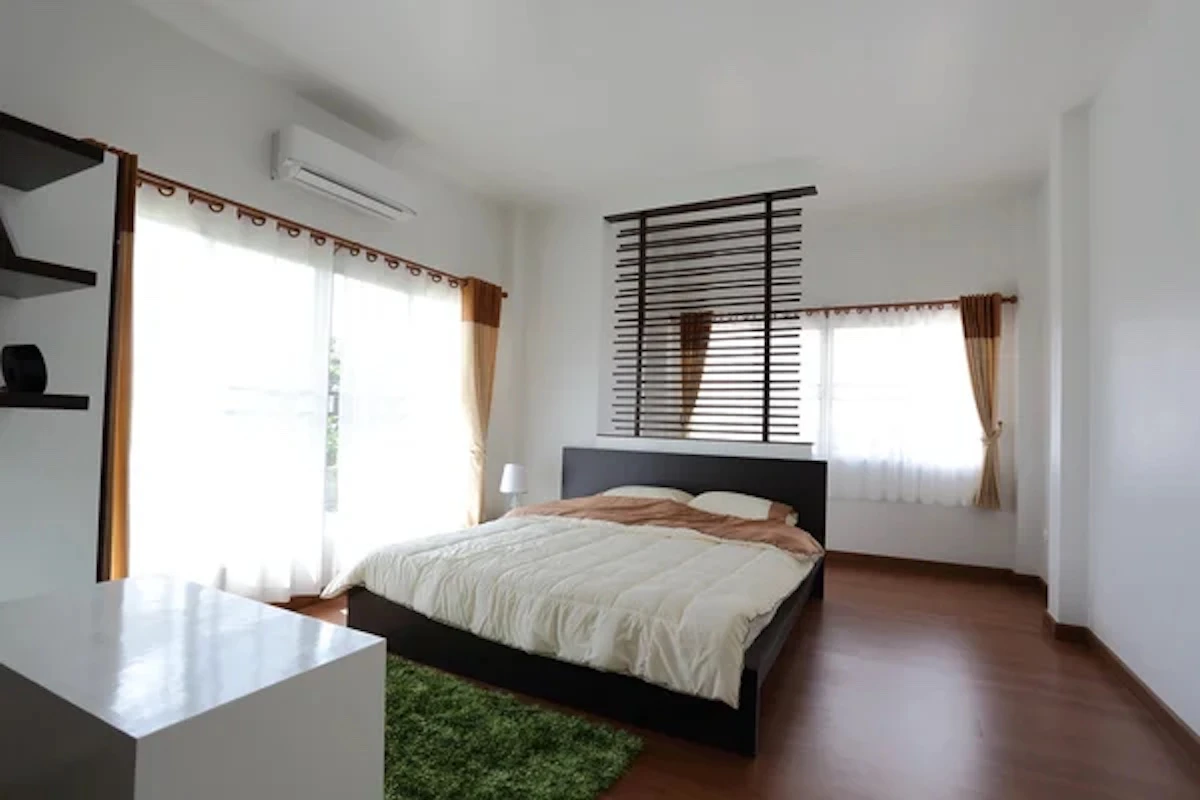
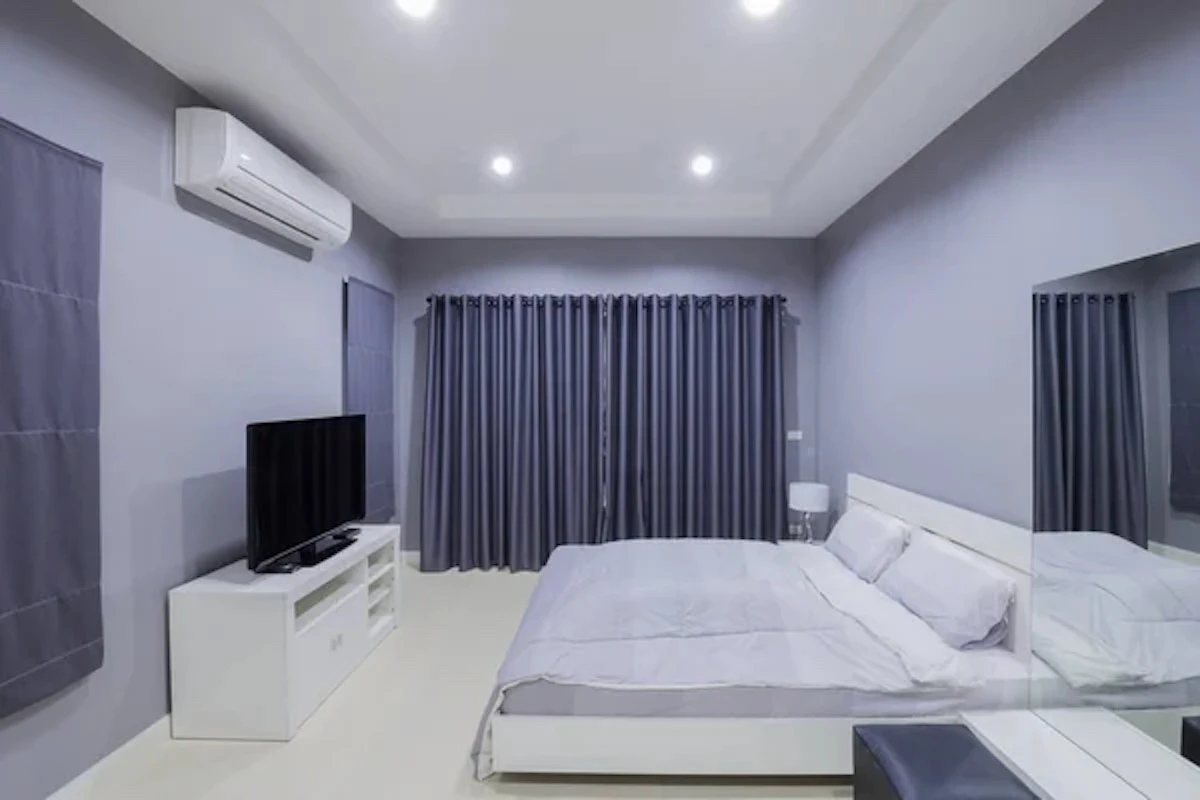
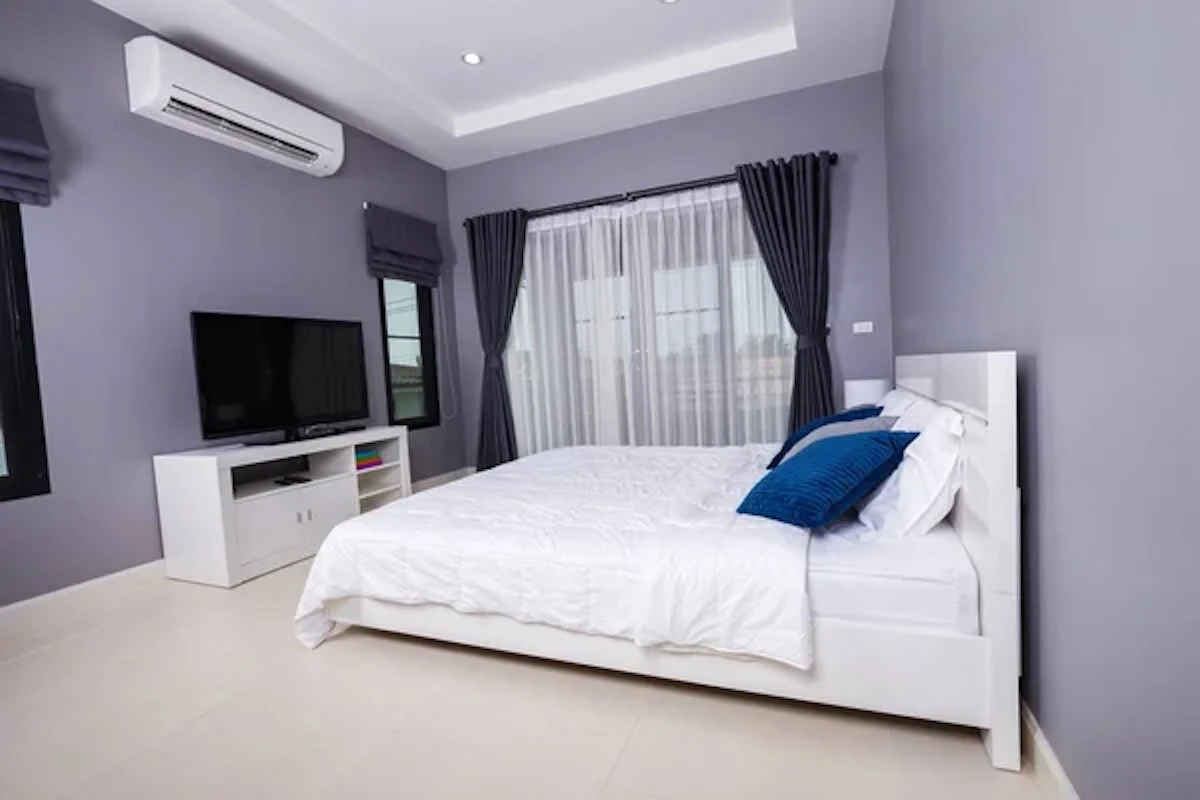
2. Put the indoor unit above the bed

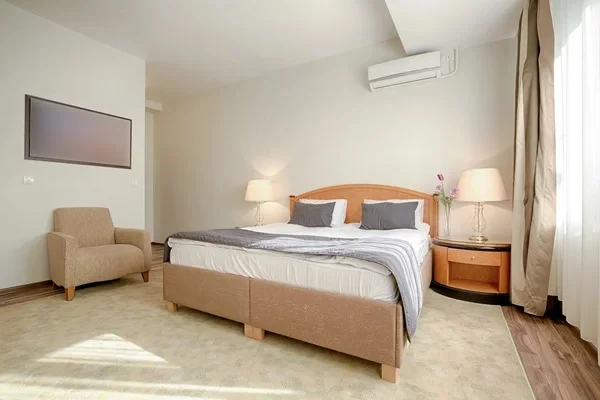
Pros
- Center of the room (good air distribution)
- Doesn’t blow air directly onto the body
- Likely on the exterior wall (easy piping)
Cons
- Problematic if water dripping
- Maintenance issue (can move the bed though)
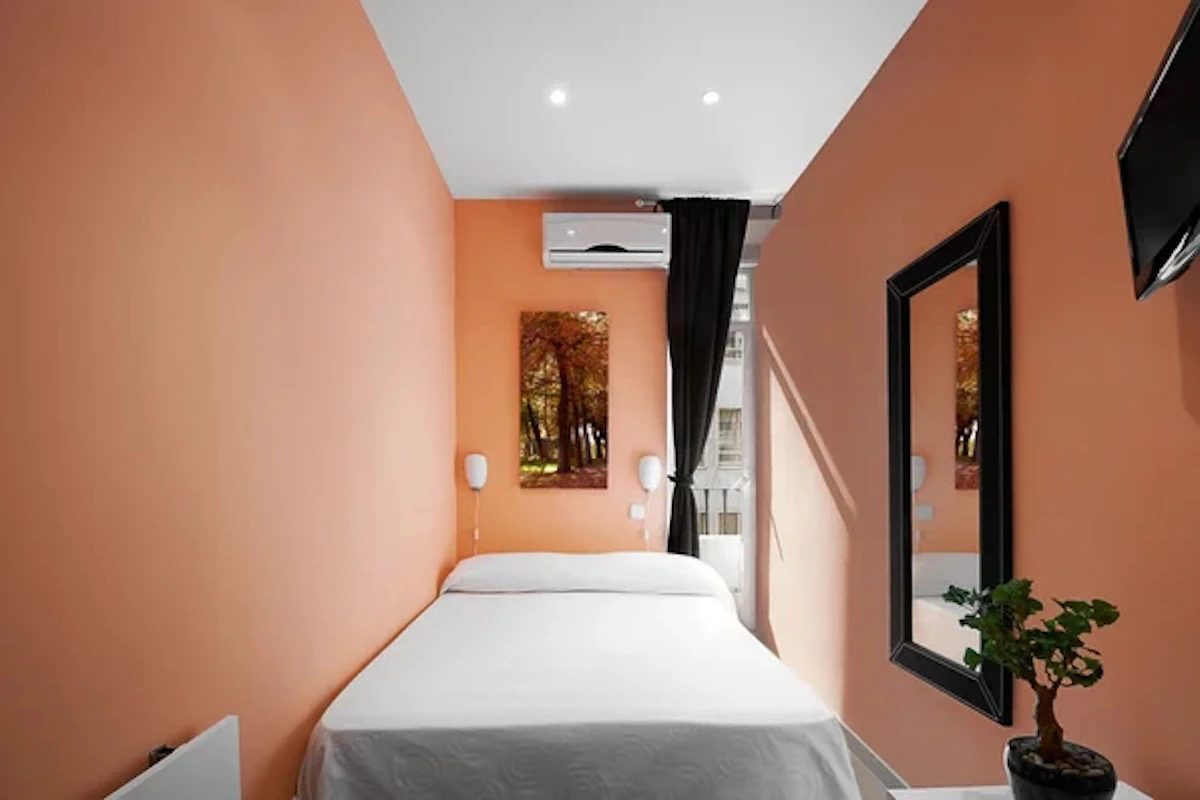
One of the most common locations to install the mini split indoor unit is about 7-8 ft directly above the bed. It is likely at the center of the room which is good for air distribution.
Besides, the mini split will not blow cold air onto your body which is good for your long-term well-being. Maintenance is more difficult though but, you can always move the bed.
3. Hang the outdoor unit low on the wall
Pros
- More protection
- Prevent snow and water damage
Cons
- Need an additional wall bracket
Another common way to put the outdoor unit is by hanging it on the wall at about 1 ft above the ground. This is good for avoiding snow from covering up the outdoor unit and keeping the outdoor unit away from contact with water for a prolonged period of time. However, an additional wall bracket is required.
4. Put the indoor unit near the exterior wall

Pros
- Good for interior wall
- Hiding the lineset
Cons
- Poor air distribution
- May get hot spots in the room
Putting the mini split indoor unit near the exterior wall (at the side of the room) is a way to hide the lineset. It is good for interior walls as you won’t have a visible lineset running on the wall. However, this location is bad for air circulation and potentially causes the other end of the room not getting the air (hot spots).
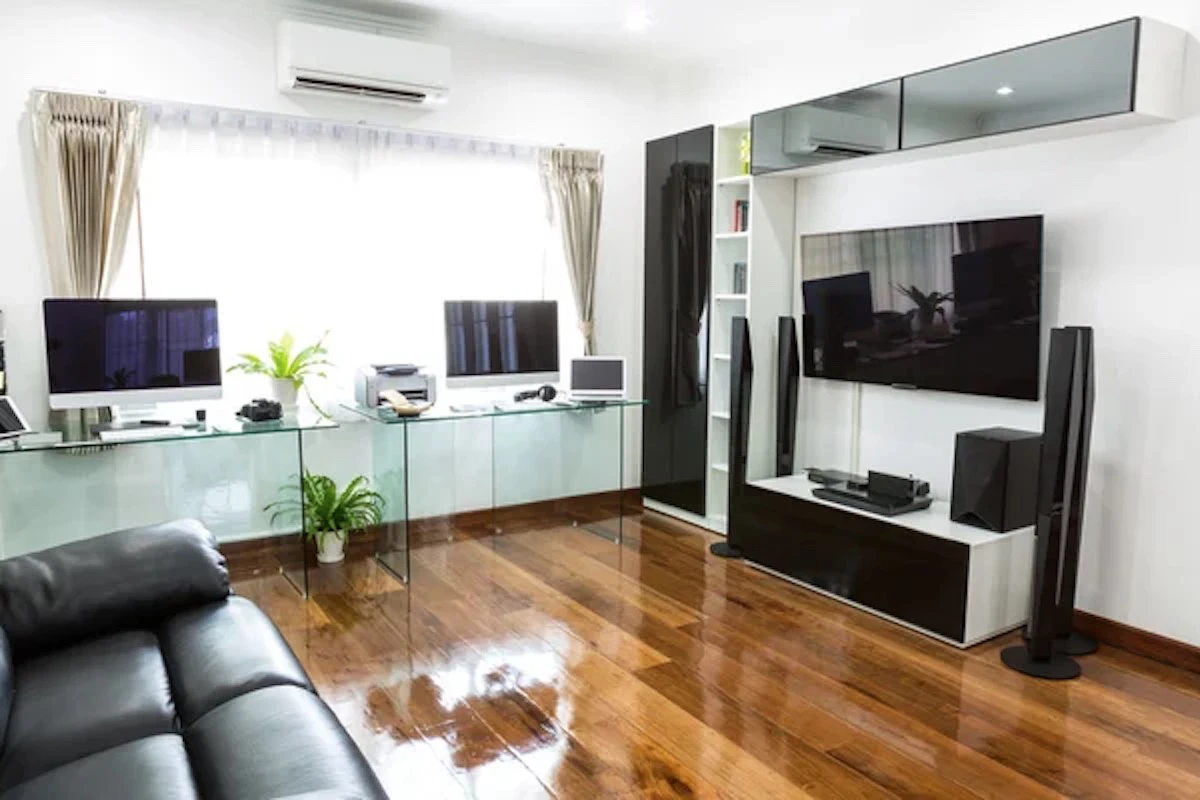
5. Hang the outdoor unit up high on the wall
Pros
- Best for airflow and efficiency
Cons
- Difficult installation and maintenance
- Not good looking
The ideal location (technically) to put the mini split outdoor unit is on a high-level wall bracket. This is best for airflow and efficiency. It also doesn’t occupy space on the ground. However, it may not be good looking, and the installation and maintenance are more difficult.
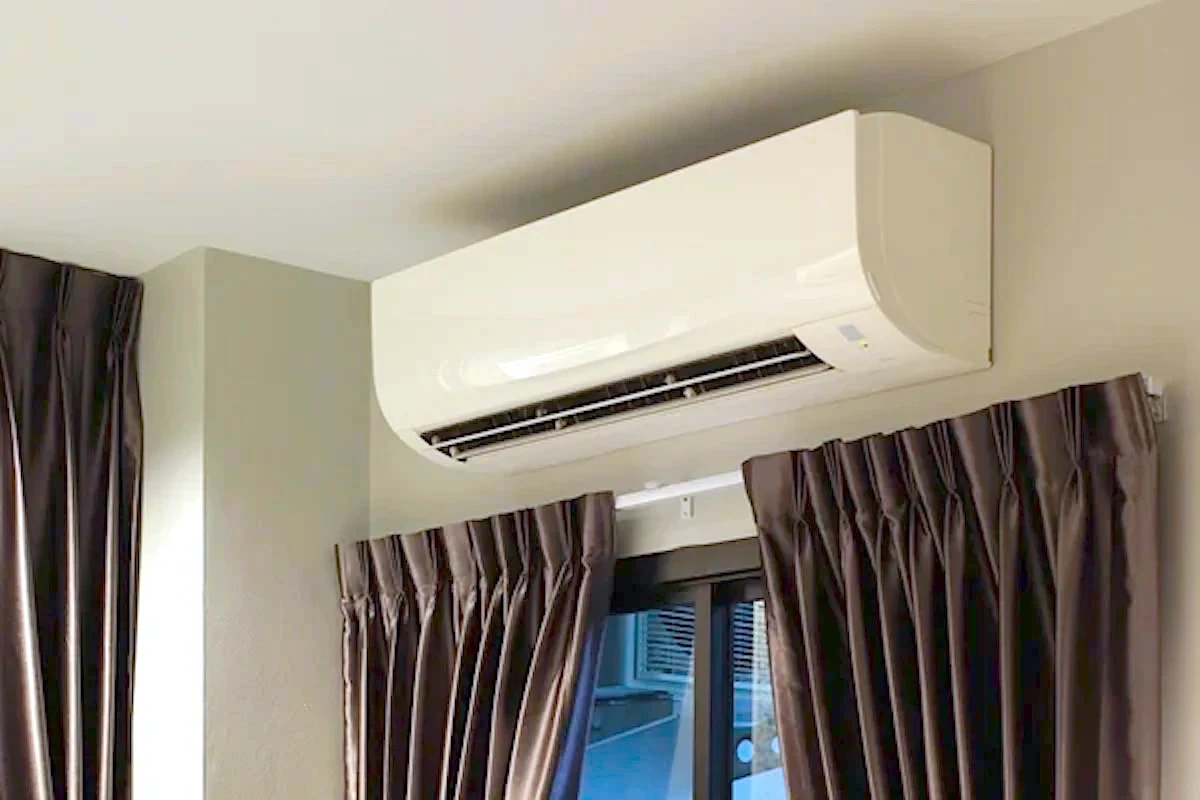
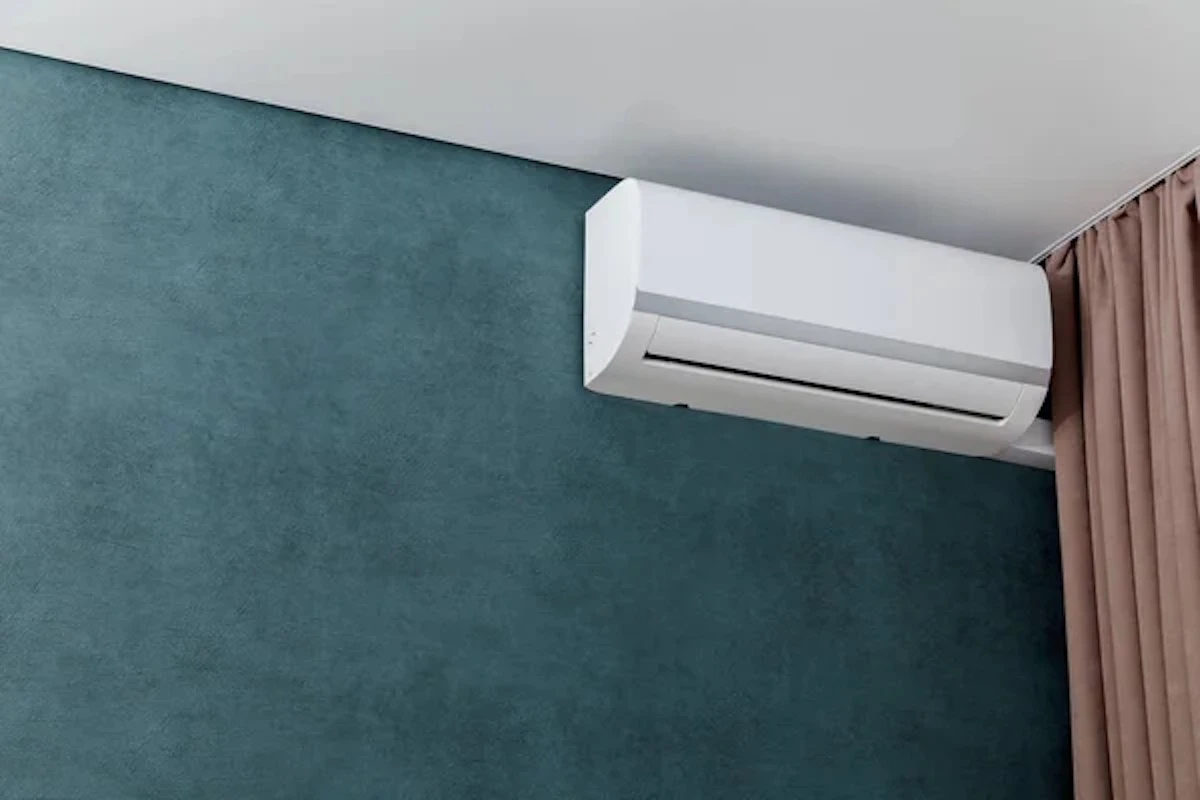
6. Put the indoor unit above the window
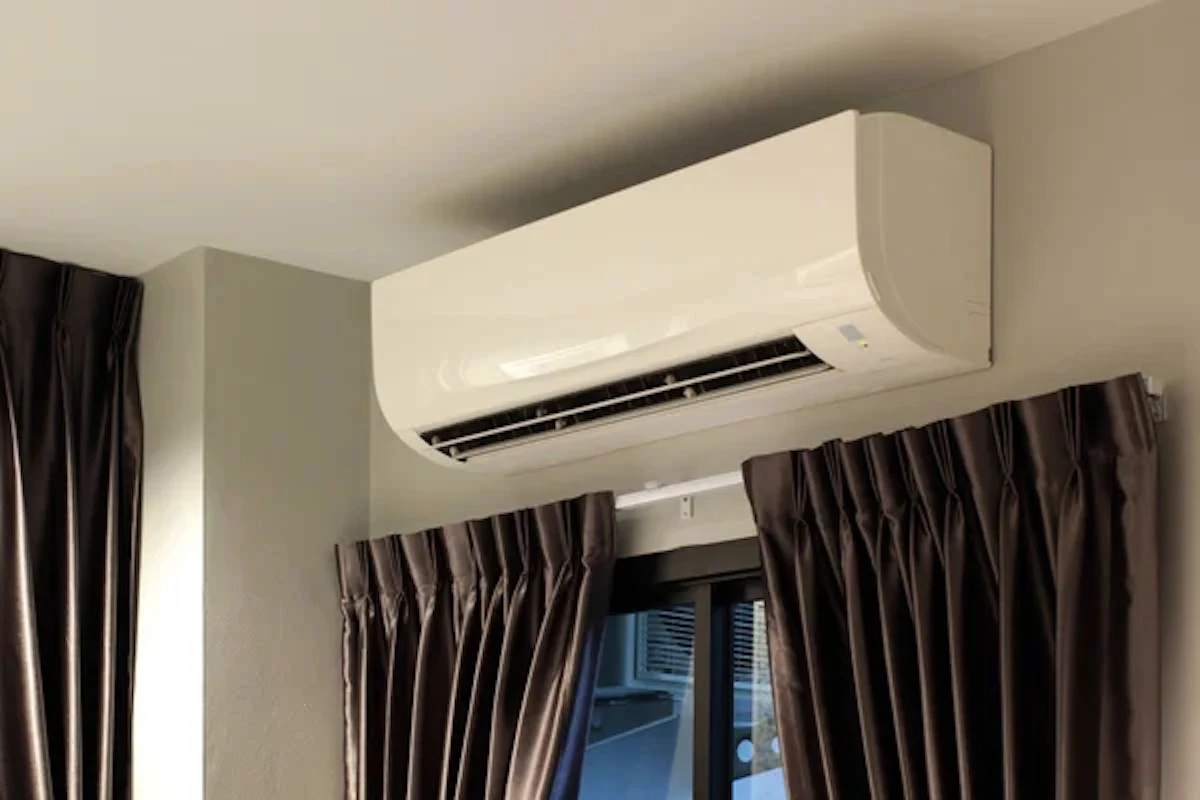
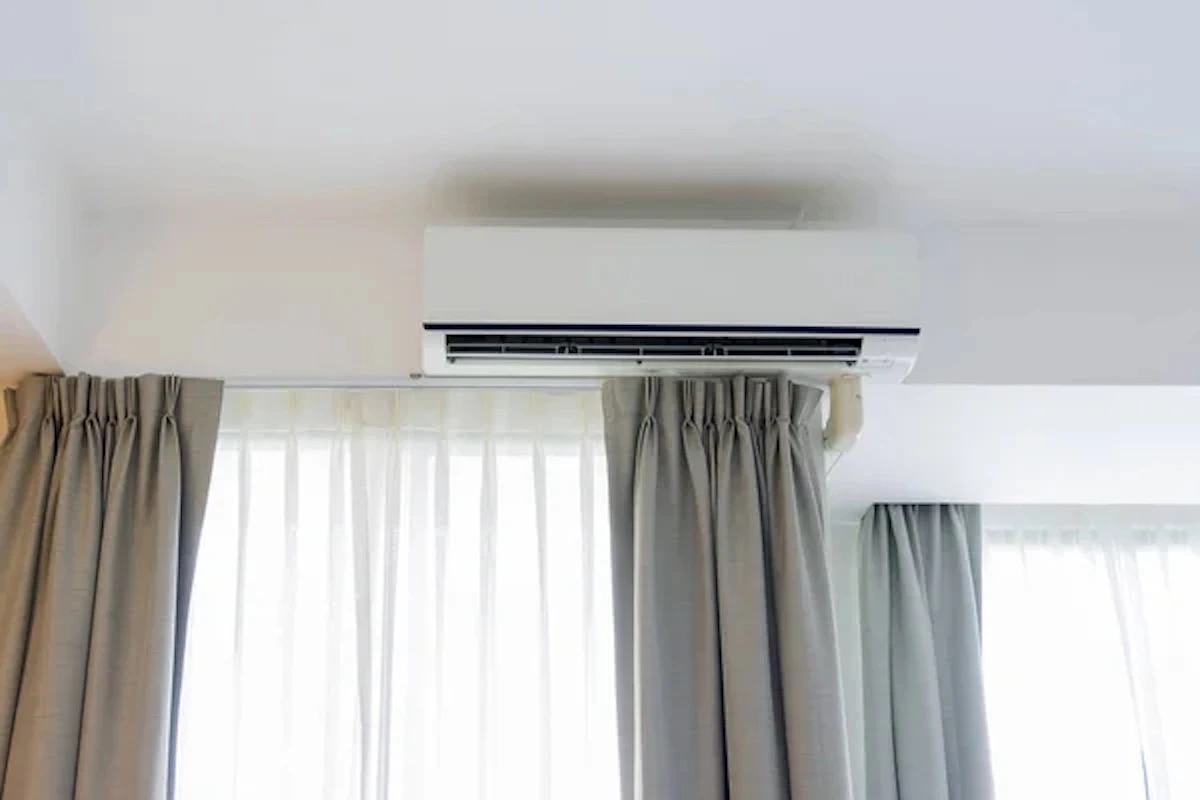
Pros
- On the exterior wall – Minimal piping
- More places to choose
Cons
- Limited clearance
- Difficult maintenance (if tight space)
Another popular location to install the mini split indoor unit is above the window. This location allows you to have minimal piping as the outdoor unit is likely right behind the same wall. However, if the space above the window is limited, you may not get sufficient clearance and maintenance can be difficult.
7. Put the outdoor unit on the roof
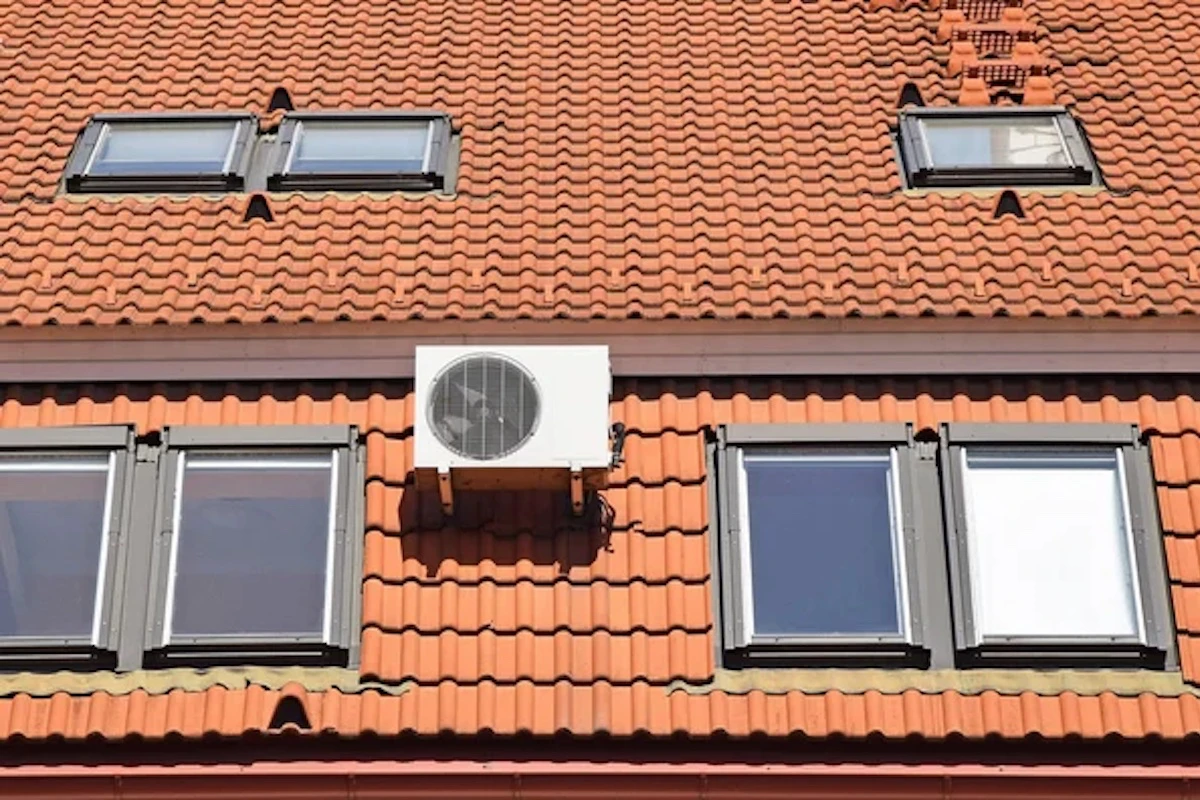
Pros
- Save space
Cons
- Difficult installation and maintenance
- Not good looking
One of the uncommon places to put the mini split outdoor unit is on the roof. This location can be very challenging for residential houses due to the difficulty of installation and maintenance. However, if you have a flat roof and there is built-in access to the flat roof, it is an excellent location.
Many people ask me if the mini split outdoor unit can be installed in the attic. Well, it can be done but not recommended but I wrote an article for it. Do read it if you want more options.
8. Put the indoor unit above the door
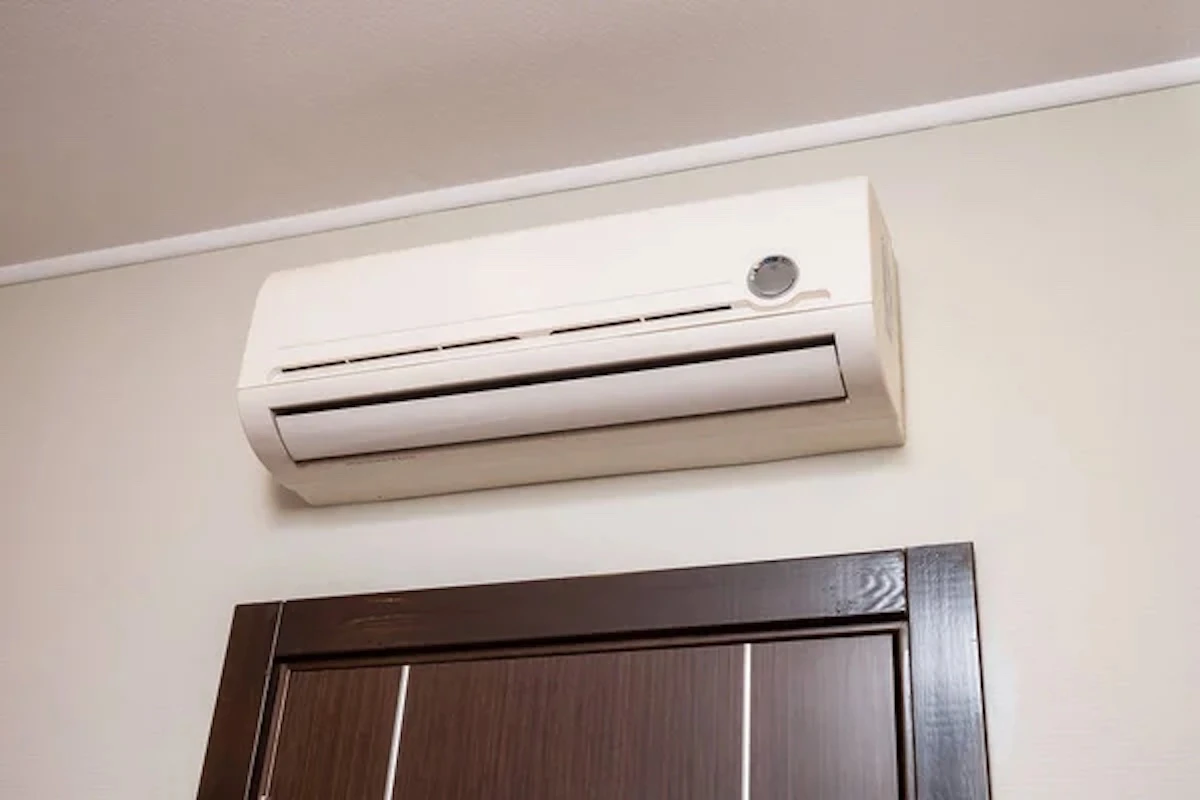

Pros
- Good for interior wall
- Lineset can go behind the wall
- For small rooms
Cons
- Limited clearance
- Difficult maintenance (if tight space)
- Cold air likely blow toward the bed
Another common location to install the mini split indoor unit is above the door. This is usually the only space available in small rooms. Similarly, the space above the door can be very tight and thus, getting the required clearance may be a problem.
9. Place the indoor unit beside the sofa

Pros
- On the exterior wall
- Doesn’t blow to the sofa directly
- Good for living room
Cons
- Likely above the window
- Limited clearance
- Difficult maintenance (if tight space)
In the living room, a good location to put the mini split indoor unit is on the side of the sofa. This location likely won’t cause the cold air to blow directly on the occupants sitting on the sofa which can lead to feeling too cold and having a dry lip.
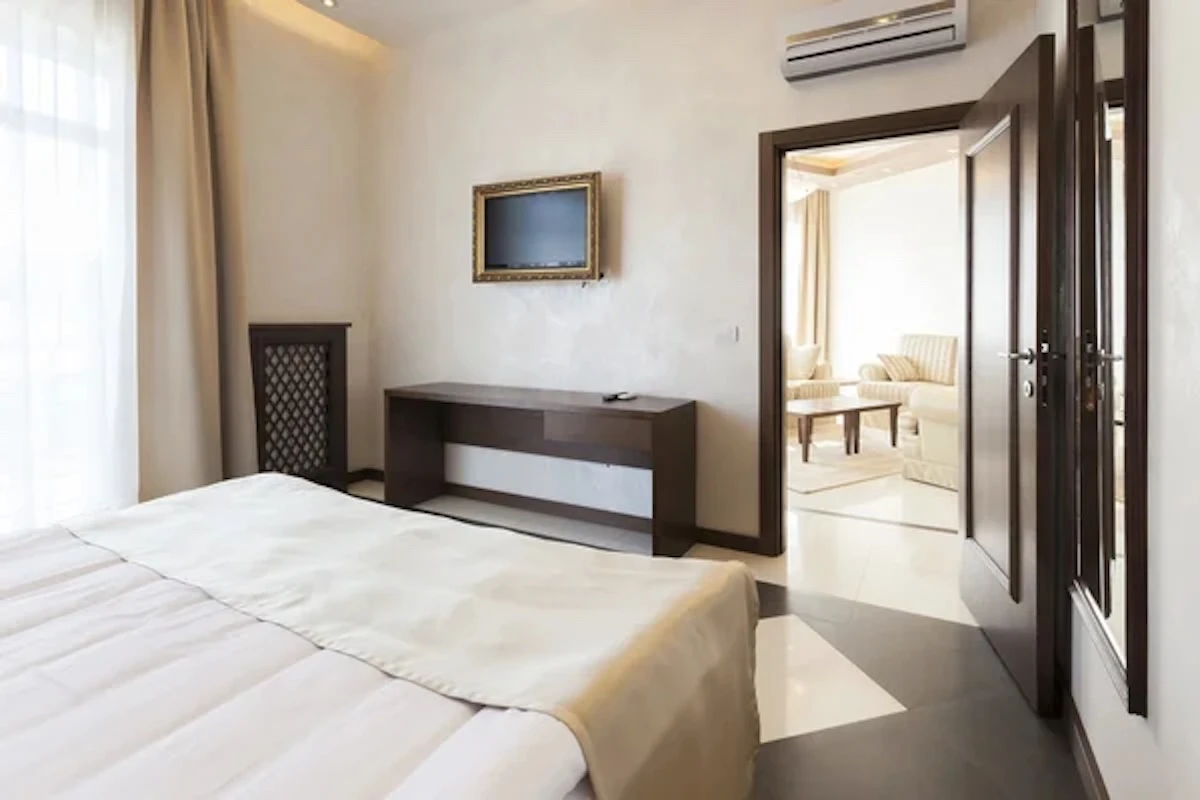
10. Put the indoor unit above a TV
Pros
- Better aesthetic
- On the exterior wall
Cons
- Bad for health (cold air blow onto the body)
- Risk of electrical hazard (water leakage)
A very common location for the mini split indoor unit is directly above the TV. This location is popular because it blows cold air directly onto the sofa which some people thought it is nice. However, it is not good for your long-term health and you risk damaging the TV if the drain pipe is clogged.
Where You Should NOT Install a Mini Split?
I’ve seen too many improper mini split installations. Most of them are mild cases that are causing the owner to pay more for the energy usage than they realize.
The most common problem is the indoor unit not having enough clearance from the ceiling for proper return air. Some homeowners like to “hide” the indoor unit with their ceiling, box up and other means. This will lead to long-term high energy usage and shorter lifespan.
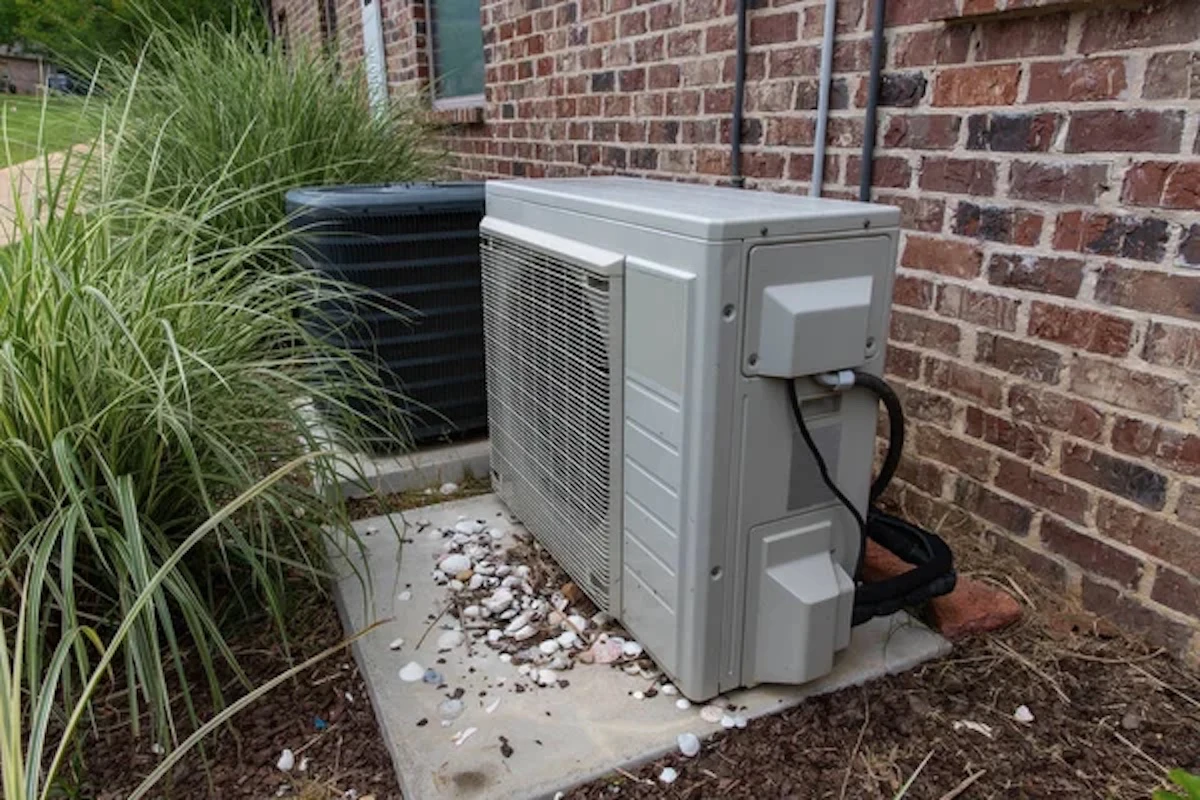
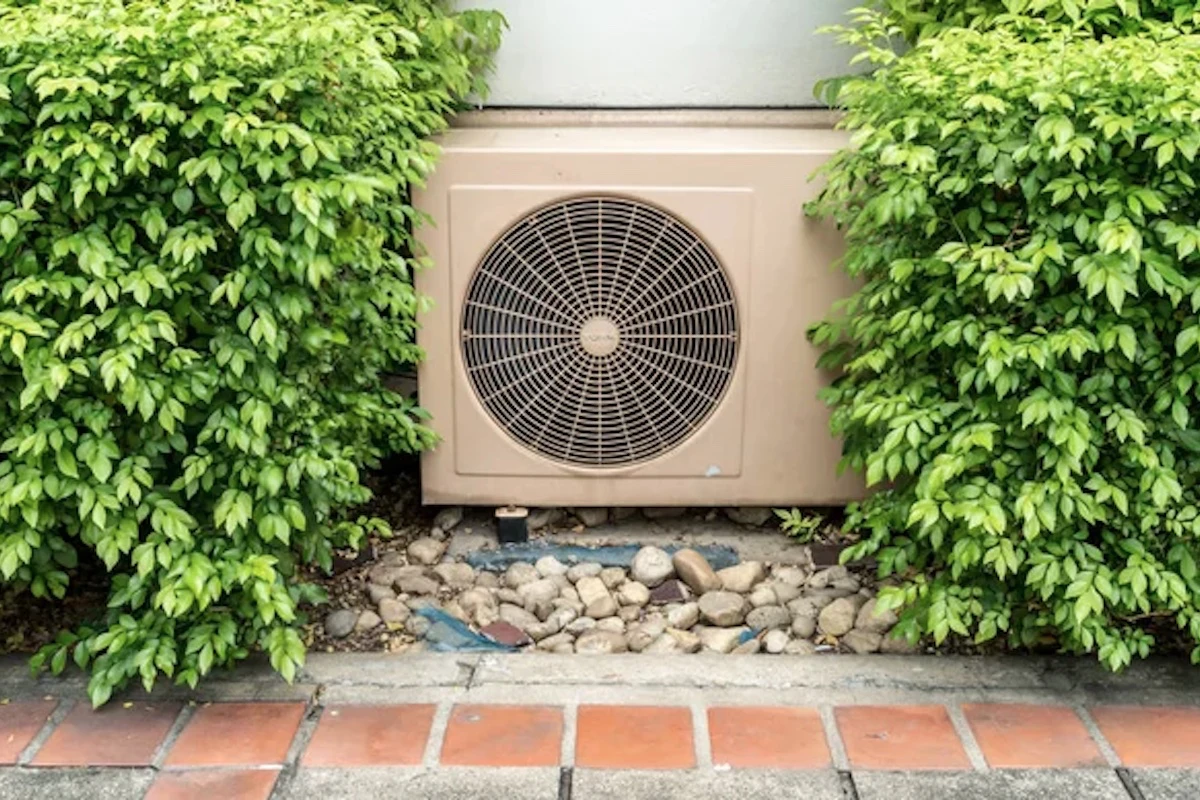
Another common issue is with the outdoor unit. Some homeowners like to put the outdoor unit behind their grass/plant, sort of hiding the unit. But, this lead to hot air unable to discharge properly. Potential problems are insufficient cooling and high power usage.
Summary
In short, the best place to put the mini split (indoor unit) is probably directly above the bed in the bedroom and beside the sofa in the living room. Whenever possible, try not to put the indoor unit above the window and door unless there is a lot of space.
For the outdoor unit, the best way is to sit it on a wall bracket and hang the bracket on the wall at a level so that it is well-protected and well-ventilated. The surrounding of the outdoor unit should be clear of obstruction for best efficiency and performance.
Other locations not mentioned above are also possible as long as the minimum clearance required by the manufacturer is met. That said, the “NOT to place” locations I just shown above should be avoided at all-cost.
Lastly, consider my Mini Split (eBook) if you want to know how can you use Mini Split in your house. If you still have doubt or not feeling confident enough, feel free to consult me.
Consultation Service
Ask me for HVAC advice such as brand selection, best model, benefits, features, placement, duct size, grille size, how to design, design check, verification and other HVAC related queries.